Using screencast software to provide student feedback

In this guest post William King from Brauer College explains how he uses screen-recording software to provide detailed feedback on student work. 

Giving effective feedback is an essential part of the teaching and learning process. The impact of feedback on student achievement has been highlighted in recent years by academics such as John Hattie who gives it an effect size of 1.13. The most successful form of feedback is by giving it face to face with your students, but in a class of 26 or more kids this is not always possible. This is where screen-capture software comes in.

Screen capture software allows you to record as if a camera was pointed at your screen. Using a microphone you can also record your voice to provide a detailed commentary. Jing is a free to download screen-capture tool that allows you to record what is happening on your screen and also to take screen-shots.

When thinking about what comments make it is important to follow a regular structure and I tend to use the Goals, Medal and Mission approach as suggested by Geoff Petty. Petty stresses the importance of giving feedback that contains real information and not just general praise or encouragement. His structure involves stating:

  • Goals: What the student should have been aiming for, which could include learning intentions or success criteria,
  • Medals: Where they are in terms of meeting those goals,
  • Mission: How to close the gap between where they are now and their goals.

It is important to write down some dot points on each of the above before you begin to prevent constantly having to re-record due to being unsure of what to say.

After installing Jing, look for the sun icon at the top of your screen and select Capture

To use Jing simply download the program. When installed you should have a small sun at the top of your screen. Open up the document that you wish to give feedback on. I usually go through the document and mark it up using the Track Changes feature in Microsoft Word before recording, so that I can see the particular areas that I need to focus on. When you have marked up the piece of work and written down some basic notes it’s time to record. Hover your cursor over the sun and select the prong marked ‘Capture’. Take the Jing arrows and use them to position the recording window over the screen area (containing your document) that you want to focus on. Then click on the video button when you want to start recording. Make sure to use a microphone as this will ensure that your voice comes across clearly so that the student can hear what you are saying. It is important that when recording that you don’t re-read the whole document, but simply hone in on which areas are most important for the student to improve in.

Jing allows you to flick between documents while you are recording so it might be handy to have a copy of the assessment criteria that you can open and refer to if necessary. Don’t open and close too many screens while recording as this can be confusing. Scroll through the document as you speak and use the cursor to point out the relevant annotations. Jing will give you 5 minutes to record your feedback but I wouldn’t use more than three as this is already a lot of information for the student to absorb. When you have finished save it to the desktop or the Techsmith site.

Remember to give students a reflection sheet to send back to you with their comments on what they should be able to improve on in their mission. Jing offers an interesting source of feedback for students and also a means for providing detailed commentary. Plus it can really help if you have bad handwriting!

Thanks to William for sharing his experiences, and to William’s colleague Leanne Hampson for introducing us to his work. William makes use of Jing for recording his feedback videos but there are other free screencasting options such as Screenr and Screencast-O-matic that could be used in the same way.

The method outlined above would also be a great way to provide annotated student work samples for students, or to model writing processes. Let us know in the comments how you’ve made use of screencasting software in your classroom.


Display Recorder: Screencast your iDevice

(Update July 2, 2012: The Display Recorder app has now been removed from the Itunes App store. At this stage it is unclear whether the app will reappear or has been permanently removed.)

There was some surprising news this morning with the announcement that Apple had approved a screencasting app for the iPad and iPhone called Display Recorder. As far as we know this is the first app that allows for full screencasting of other apps on your Apple device. Previously if you wanted to record a screencast you would need to link wirelessly to your computer using the Reflection app, which we looked at recently.

Display Recorder costs $1.99.  The app seems to work reasonably well though at this stage there is a bug that means you have to change your region settings on your device to United States. You can do this in Settings>General>International>Regional Format.

Recording of the screencast was simple. Just open the app, hit record and then you can skip between apps by clicking your home button and selecting the app you want to use (you can also double press your home button to quickly access open apps, or use the four fingered swipe to switch quickly between apps). Once you’ve recorded, head back to Display Recorder and click stop.

We did run into some problems uploading to Youtube as the upload froze on each attempt. Instead we saved the video into the iPad’s Camera Roll and then uploaded from there. You might use an app like iMovie to trim the video and clean up any errors (particularly the first and last few seconds when you need to start recording within Display Recorder).

Display Recorder looks like a promising screencasting solution. We had a very quick play with the app and recorded our first impressions which you can watch below. (1.17)

Screenr: a free screencasting tool

During his keynote speech at the recent ICTEV 2012 conference, Alan November explored the value of screencasting in education. He had spoken to a student about why they preferred to learn from a video made by another student or their teacher, instead of having a teacher explain concepts on a whiteboard to the whole class. They student told him that learning this way was great because “my teacher doesn’t have a rewind button”.

The popularity of the flipped classroom model and sites like Mathtrain or the Khan Academy show that viewing and recording instructional videos is a great way to supplement and support learning. Teachers might record short videos about key concepts or students could record their process for completing a task. Having a student consider how best to teach a concept or procedure reinforces their own learning. There are great apps like Educreations that work as a virtual whiteboard to be recorded and shared. We’ll explore this tool in a future post.

For recording video of your computer screen we recommend Screenr. This free service is stable, requires little installation and allows you to easily publish to the web or save your files for later viewing. You can also log in with a Google or Twitter account so that’s one less password to remember. It does require an internet connection while you record, so if this is an issue then you might try a free program like Jing instead.

To get started, have a look at our screencast about Screenr below. (3.25)

More maths screencasts

Further to the post about Mathtrain.TV a few weeks ago, another school site sharing maths screencasts has come to my attention.

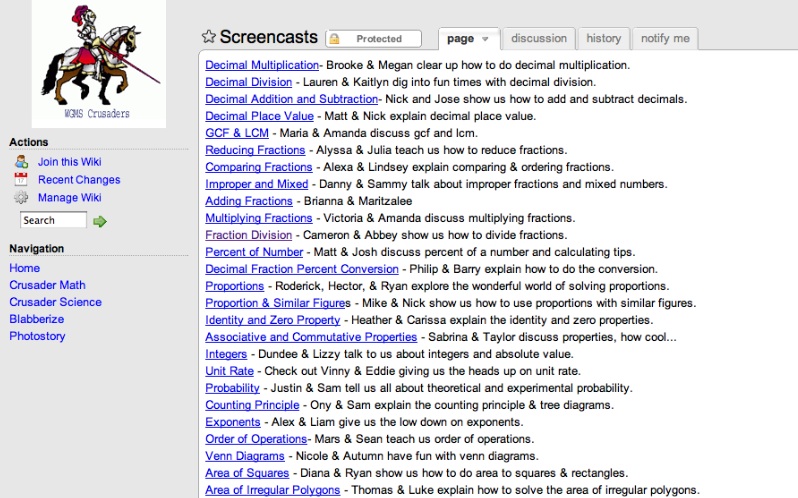
maths screencasts

Craig Mantin and Willowgrove Middle School students have created over thirty screencasts embedded in this wiki to share with audiences around the globe.

This site is useful in two ways. The first to provide a resource for students studying maths who may need further explanations on the topic. The second is to provide an exemplar of how students can demonstrate their learning of maths concepts (and media creation skills) by teaching others.

Jing update

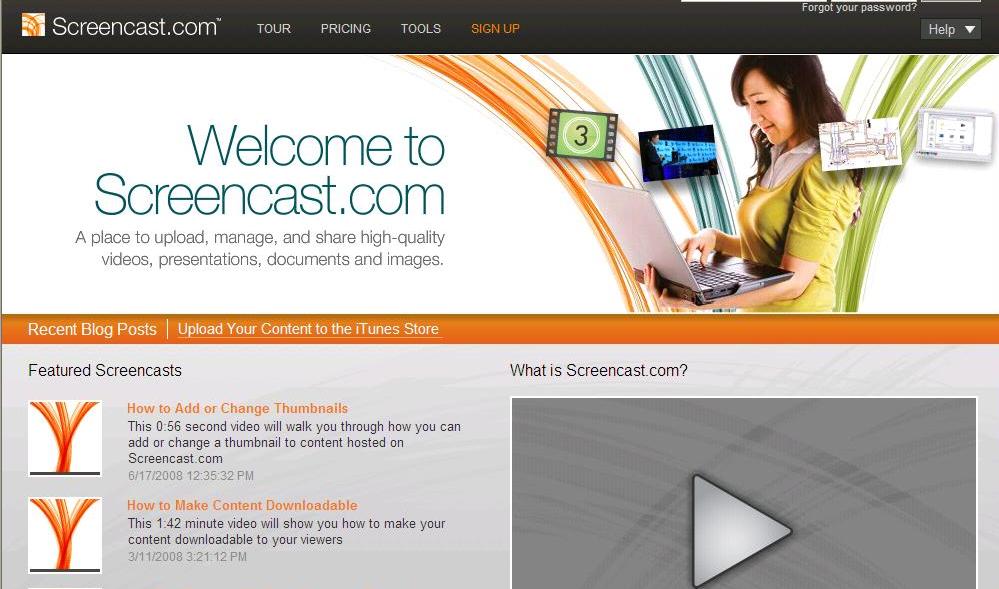
A previous post looked at the screencasting tool Jing. The people that developed Jing have also developed a tool called ‘Screencast‘. Screencast allows users to record, store and share any content from Jing such as videos, images and presentations.

Screencast homepage

Screencast homepage

Screencast.com has some new information about:

Screencast is free, although there are premium offerings that can cost US$99 pa. The free account includes 2GB storage and 2GB bandwidth per month. Screencasting is a great way to teach others how to use a particular computer resource or Web 2.0 tool.

Jing Project

Jing Project is a screencasting tool. What does that mean? Jing Project allows users to record output from their computer screen. So whether it’s a static screenshot or a video recording demonstrating how to use a program, Jing allows users to record, save and then share images. Captures can be annotated with arrows, text and highlighting before saving. Images and recordings can then be saved to computer, Flickr or embedded into URLs.


When you sign up to Jing, the screencasting icons are loaded onto your computer and users are able to see and access them at all times for ease of use. The icons are placed at the top of the screen and are fairly unobtrusive.

Jing’s blog gives more information about capabilities and how to use the tool. Here is a video that shows how Jing can be used.