Clip go the shares with eduClipper

The web is awash with curation and bookmarking tools that promise to help organise resources and links. Given the vast range of educational and teaching resources available, it’s not surprising that educators have embraced many of these tools, using them to organise personal libraries and share with colleagues and students. In recent times we’ve seen curation tools like Learnist and Edcanvas aimed specifically at education, and the recently launched eduClipper is another interesting entry into the educational collation field.

eduClipper helps users bring together their own uploaded resources and material from the web  into subject boards. These boards can be collaborative, making it useful for teachers who want to share planning or collate resources with a class (student accounts are available) . Popular file types (such as JPG & PNG images, PDF or Word files) can be uploaded manually, and web pages can be added as a bookmark or as a clip of specific text using the eduClipper bookmarklet. Google Drive files can also be added. Each eduClipper account includes 1 gigabyte of storage.
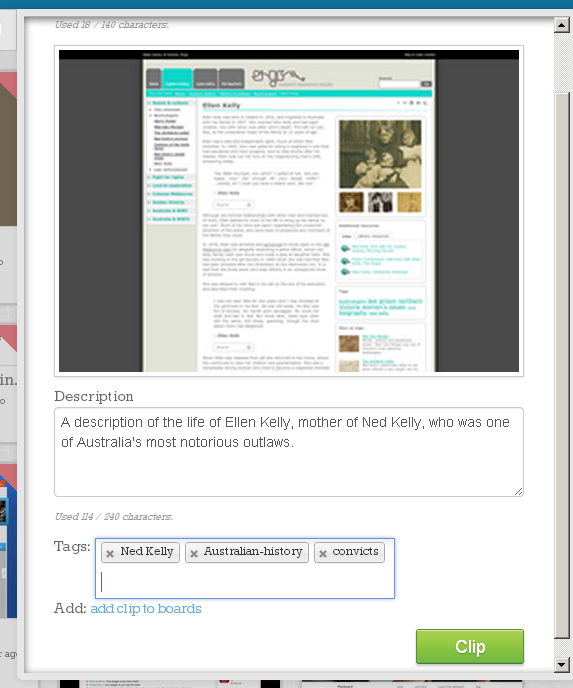
Clips can be taken added from Google Drive or a URL. Popular file types can also be uploaded. Details and tags can be added to a clip, and clips can be organised into subject boards.

eduClipper is designed for and limited specifically to primary and secondary educators and students. Several features demonstrate the level of thought that has gone into the design, such as the flag feature that can be used to identify inappropriate content. The eduClipper help page outlines the flagging process;

When you flag a piece of content, the following will happen.  It will be frozen from the site meaning that it is no longer able to be seen.  The user will get an Email notification that their content has been flagged and why.  Their teacher (if associated with an educator) will also receive an Email letting them know that the student’s content has been reported.

The student may enter an appeal for the content which will be sent to their teacher and eduClipper employees.

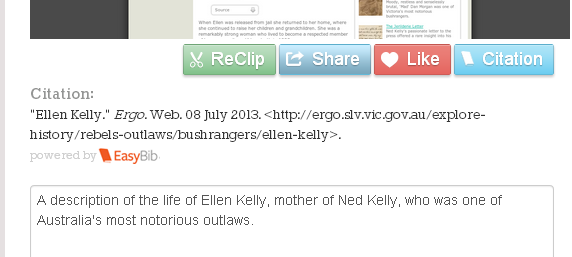
One exciting aspect of eduClipper is the citation feature, which uses the EasyBib service to provide a citation for each clipped resource. In our tests it worked very well when clipping links from the web. It would also be great to have an option to manually enter citation information for items that aren’t recognised automatically by EasyBib, so hopefully that comes in future updates. The citation feature was brought to my attention by Celia Coffa, who has also written a great post about how she plans to use eduClipper with her class. I look forward to reading more posts about how it goes.

eduClipper’s citation tool sets it apart from many other organisational sites

In my initial testing of eduClipper I did find some slight bugs when clipping items, particularly when using the eduClipper bookmarklet in Google Chrome. (Update: The bookmarklet has now been updated and seems more reliable. Here is Adam Bellow’s video demonstration of the bookmarklet). Some pages and boards also took a bit of time to load. This is probably to be expected with a relatively new web app  and we’d expect any bugs to be ironed out soon, but at this stage I wouldn’t recommend using it as your primary way of storing resources. We’re also yet to see how eduClipper will cover costs in the future, and the Terms of Service do list the service as ‘currently free’. As always, we’d encourage you to read these terms and consider the issues in using any free tool. eduClipper does include an option to export data out of your account, so that can give you some peace of mind.

My initial impression of eduClipper is that it is definitely worth testing out, although I do have some minor reservations related to a few bugs that should hopefully be ironed out soon. Already the growing community of users are sharing some great resources, and limiting the site to K-12 levels makes these resources much more relevant than what you’ll find on a site like Learnist. At this early stage eduClipper looks to be a valuable and promising addition to a growing field.

 

Tame those bookmarks

So far in our digital workflow series we’ve looked at ways to triage information for later reading, and also how to save interesting articles or resources to our own digital library. Using a short term tool like Pocket along with a long term storage tool like Evernote makes for a powerful combination, but we also need to consider how best to share with other people. It’s here that we look at the next step of the workflow process- share.

Share

Sharing our own work or promoting resources created by others is an important aspect of being a valuable member of our network. Think about all of the great resources you’ve found online, and how you found them. These resources were created and shared by someone. They were then promoted by others, either on social media, through bookmarking sites or by linking in blog posts. Everyone involved in that process has played some part in bringing that great resource to your attention, so by adding our own thoughts or recommendations then we pass that resource on to others.

One great way to do this is through a social bookmarking tool. These tools let you bookmark great resources to build your own library of links, and they also let you share with others. They are a much better alternative to the old workflow of bookmarking that might work something like this:

  • find a great site
  • bookmark it in your browser
  • email it to yourself
  • email it to your colleagues

But this process has some problems:

  •  your browser bookmarks will probably quickly become unmanageable
  •  you will email it to yourself, not have time to look at the link and then put it in a folder marked Later or Stuff (which you’ll never check)
  • your colleagues will be busy, and drag it to their own folder marked Later or Stuff (which they’ll never check). Then you’ll eventually decide that you don’t want to bog them down with emails
  • you and your colleagues miss out on those great resources

So instead of that process, let’s find a better way to save those bookmarks, and put them in a place where anyone can find them when they need them. To do this you can use a social bookmarking tool, and one of the best around is Diigo.

Here’s a brief introductory video showing how Diigo works.

How to get started with Diigo

  • To get started with Diigo, visit diigo.com and sign up for an account.  There is also an option for an upgrade to free educator accounts if you sign up with an email address from a registered educational domain (such as Edumail)
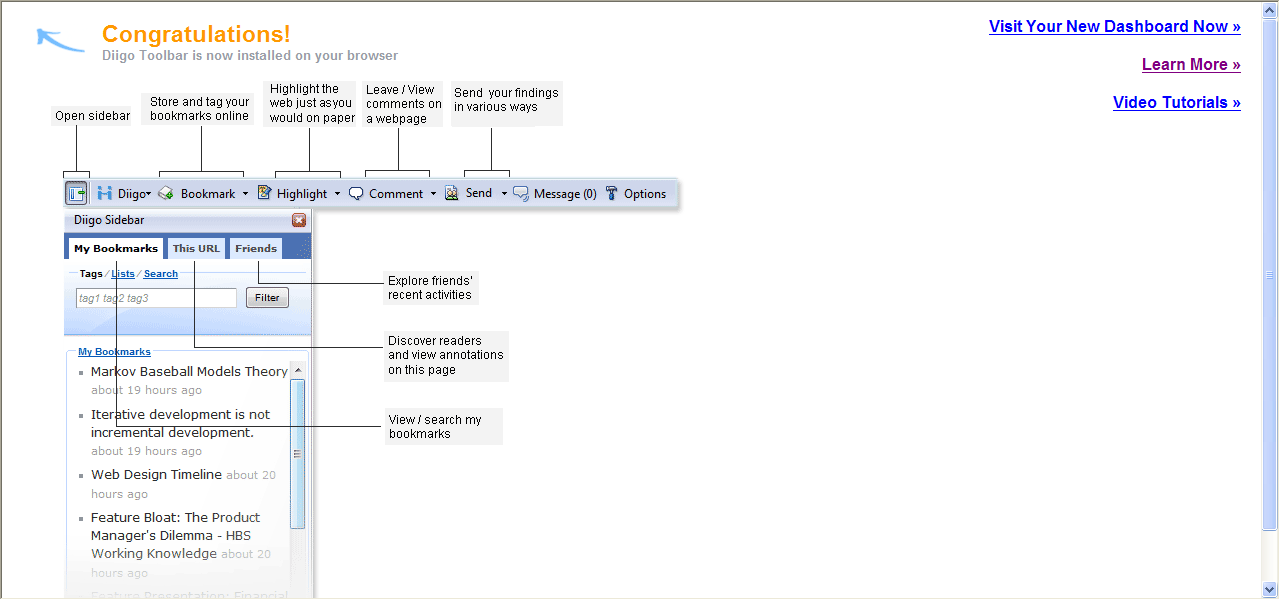
  • The one problem with Diigo is that adding your first bookmark is quite a complicated process, and until you get your first bookmark added the library page is a bit bare. So we’ve put together a complete guide to getting started with Diigo, including installing a toolbar in your browser, organising your library and much more.
  • Once you’ve added a few bookmarks to your library, explore the annotation, highlighting and sticky note features of Diigo.
  • Now that you are building your own library, why not search for groups of educators with interests in your subject area? One great group to join is VicPLN, which includes a wide range of general teaching and learning resources. Click this link, request to join (select Join this group)and when you’re approved you’ll be able to share your favourite resources with the group. You can also comment on links and save any links you love into your own library by selecting More>Save.

    You can comment on the links of people in your group, and also save their links to your personal library

  • Now that you’ve seen how Groups work, form your own group within your school. Instead of emailing interesting links to colleagues make sure that you all share them into the group, so they are there when anyone needs them. Use tags to organise your resources into subject, year level or topic. You could also create groups within your classes and have students post interesting links as they complete their research (make sure you get an educator account to do this).
  • Now that you’ve worked out a place to store your new bookmarks, think about what you want to do with those bookmarks you’ve accumulated over the years. If they are all stored in your browser then you might think about exporting them all to a file and them importing them into Diigo. Look for the export option in your browser’s bookmark manager, and when you’ve exported all the bookmarks to a file visit Diigo Tools. Choose Import, select the file and import them into your library. Or, you might like to declare ‘bookmark bankruptcy’, get rid of all of your old bookmarks and just start again from scratch. It’s a big step, but might be worth it!
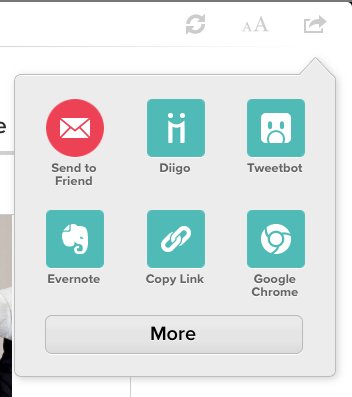
  • If you are using the mobile version of Pocket, look for the Diigo option in the sharing menu. Hook up your Diigo account to make saving great articles from Pocket direct to Diigo.

    Pocket’s mobile app includes an option for saving your articles to Diigo

  • Lastly, now that you’ve organised your bookmarks into Diigo, think about what bookmarks you still need in your browser. These should only be pages that you visit regularly, and ones that you need for quick access. Try to keep your browser bookmarks down to your most used websites (email, banking, newspaper, RSS reader, social network, Evernote, Diigo etc) and put anything less important into Diigo, where it’s safe but not in the way.

    Get your browser bookmarks in order and only save your most visited sites in your browser

The only thing to consider now is what you want to save to Diigo, compared to what you want to save into Evernote. Diigo doesn’t store pages forever (unless you pay for a premium account), so basically if you want to make sure you’ll always have access to the contents of an article, clip it into Evernote. If the page is that valuable then you probably want to save the bookmark and share it to your Diigo followers or groups as well. If you are not sure whether you’ll need the page in the future, but want to have that option, then that’s the perfect page to bookmark just in Diigo.

Diigo (or other social bookmarking tools like Delicious or Kippt) are the perfect option for saving your own bookmarks and also for sharing interesting resources without feeling like you are pushing them on other people. Using Pocket, Evernote and Diigo and having a clear idea about the role of each tool means you will always be able to find that resource that you need, when you need it.

Of course, there are a number of other ways to share the resources you find, such as on social media, through curation tools or even in person. In the final post of this series we will look at other ways to share, how to streamline your workflow by joining these tools together and also how to reflect more deeply on resources you’ve found.


Why it’s worth picking Pocket

Pocket is one of the many tools that aims to help you keep track of web content. This free app serves as a good way to save articles and videos and is particularly useful for storing content when you are on the move so you can then explore it at a more convenient time.

Formerly known as Read It Later, Pocket was recently renamed and redesigned. It offers a very smooth interface and a number of useful features. Bookmarks can be added via email, through a bookmarking button that can be installed in your web browser or through a number of different mobile apps that can integrate with your Pocket account.  Many mobile Twitter apps and RSS readers now include a ‘Read Later’ option which will let you save interesting content to Pocket with one click. Considering many people read their Twitter feed when on the move or in a rush, being able to save this content for a more convenient time is very useful. One excellent feature of Pocket is that any links that have been added via a tweet will also retain the content of the original tweet. In this way you can save a link shared by someone, explore it later and then still be able to keep track of who shared the original link.

Saving to Pocket from Tweetbot on iPad

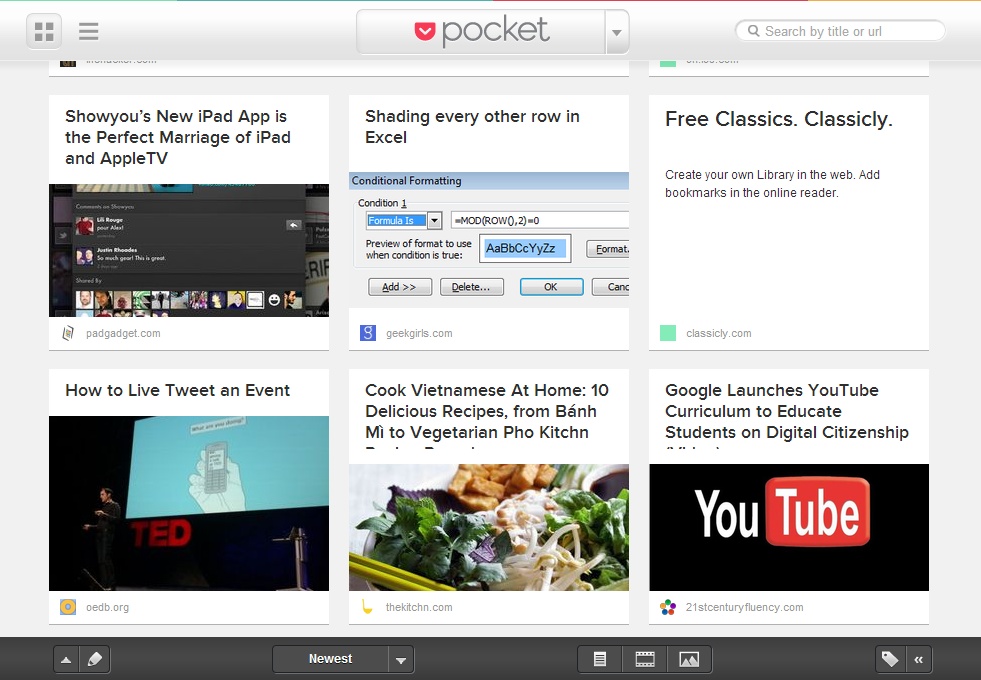
Pocket’s biggest competitor is Instapaper, which has been one of the most popular article saving options for quite a while. While the two services offer similar features, there are enough differences between the two to mean that you could make use of both. Instapaper is more suited for saving longer articles and provides a more elegant reading experience. But Pocket is perfect for saving shorter articles, videos or pictures. The reading list view (below) in both the mobile app and the web interface is also much more attractive than Instapaper. Unread content is presented in a magazine style layout, and once you select and view a link you can choose to either keep it by marking it as read, star it to keep it as a favourite or choose to delete the link permanently from your library. Saved content can also be tagged or searched.

Your unread links are presented in a magazine style layot

Pocket isn’t comprehensive enough to manage a large library of links in the way Diigo does, nor does it provide as smooth a reading experience as Instapaper. But the integration with a number of other mobile apps, as well as an attractive reading layout means it is the perfect option for keeping track of those video clips and short articles that you want to explore when you have more time.

Pocket for IOS

Pocket for Android (Google Play store)

Diigo user guide now available

We’ve now posted a user guide to help you get started with the bookmarking tool Diigo. This brilliant service allows you to save, tag and search your own bookmarks. Diigo also lets you create public lists of links and share your bookmarks with other people in groups, such as the #VicPLN Diigo group. Diigo is the perfect way to share bookmarks within your faculty, your class or your learning network.

You can find the guide to getting started with Diigo under the Guides menu, or visit it directly here. The video tutorials are also available as a YouTube playlist which you can watch below. Remember to subscribe to Bright Ideas on YouTube to stay up to date with all of our new videos.

Taking Diigo beyond the bookmark

For anyone who hasn’t yet used Diigo, or anyone who uses it purely as bookmarking links for students may find the information on ‘Taking Diigo beyond the bookmark”  from Keith Crawford useful. Keith is a blogger who says

My site is part of my mission to help people and organizations understand how to use technology to accomplish their mission. I’ve been helping organizations implement technology for 10 years as a Network Engineer and I’ve been blogging for the past 5.  My desire is to help individuals and organizations realize the transformative power of technology.

His post on Taking Diigo beyond the boomark is an excellent one. With examples of both educational (such as creating reading lists for teachers and or students) and personal uses (DIY recipe collection), this post really makes you think about how the power of Diigo can be applied to many situations.

diigocheck

Worth a look, a think and a discussion with colleagues to see how you can take Diigo beyond the bookmark. You can access the Bright Ideas Diigo bookmarks here.

LiveBinders

Livebinders is a free site and bills itself as ‘The knowledge sharing place’.  It is a type of online binder where a number of websites can be ‘put inside’ the binder as a collection. Two great examples of use would be as an ePortfolio of websites that you have developed (blogs, wikis, netvibes, etc.) and as a repository for students’ school assignments, whether it be as a bibliography of sites uses or sites the students have developed themselves during their school career.

Livebinders

From the learn more section of the website comes the following information:

A better way to share multiple links quickly and simply

Take Control of Your Information

  • View links like pages in a book instead of URLs on a page
  • Combine PDFs and Word docs with the links you collect
  • Organize your links and documents into tabs and subtabs

Save Time

  • Conveniently update information without having to resend links
  • Avoid the hassle of finding links in old emails and long bookmark lists
  • Update LiveBinders from one place

Share with Pride

  • Build a library of livebinders
  • Allow others to view your public and private binders
  • Embed livebinders on blogs, web pages and desktops

LiveBinders is Free!

  • Sign Up to create an account so you can store your livebinders right away
  • Add the ‘LiveBinder It’ Bookmark Tool to your browser toolbar
  • Start browsing the web. Find a link you want to save then click on the ‘LiveBinder It’ to automatically add the link to a new livebinder

It is easy to add a LiveBinders button to your browser and each time you’d like to save a site, just click on ‘links’, then ‘add to LiveBinders.’ Here is a LiveBinder that I created earlier:


 (One LiveBinders is open, click on each tab to open each website.)

As you can see, LiveBinders can be embedded into blogs, wikis and the like.

Be aware that students need to be 13 years or older to sign up for a LiveBinders account.

Clipmarks

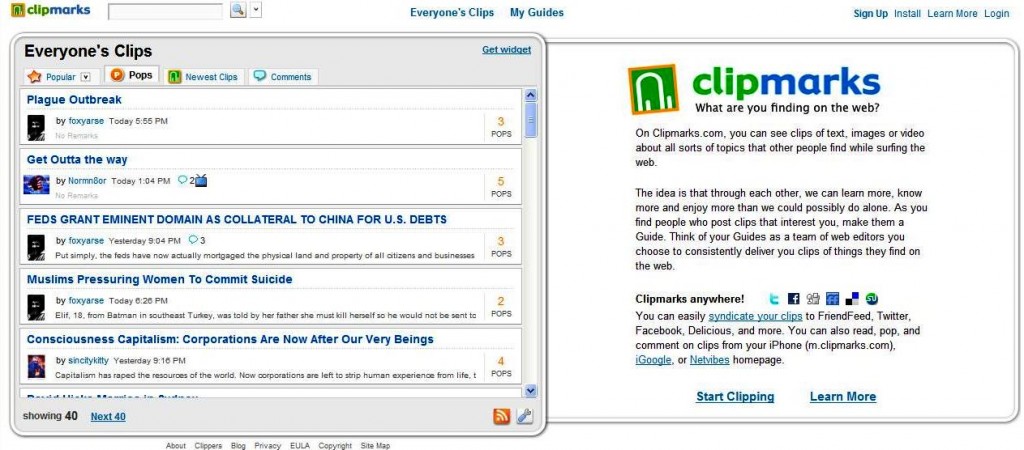
 Clipmarks is a social bookmarking site that is quick and easy to use. The website explains:

On Clipmarks.com, you can see clips of text, images or video about all sorts of topics that other people find while surfing the web.

The idea is that through each other, we can learn more, know more and enjoy more than we could possibly do alone. As you find people who post clips that interest you, make them a Guide. Think of your Guides as a team of web editors you choose to consistently deliver you clips of things they find on the web.

Clipmarks anywhere!

You can easily syndicate your clips to FriendFeed, Twitter, Facebook, Delicious, and more. You can also read, pop, and comment on clips from your iPhone (m.clipmarks.com), iGoogle, or Netvibes homepage.

Homepage
Homepage

By installing Clipmarks to your browser, one click on your favourite sites and you can start sharing with colleagues, students and networks. For more information about how Clipmarks works, watch this brief video:

Love the idea of embedding clips into blogs, Netvibes pages and so on.

Thanks to Tom March, the Keynote speaker at the 21st Century eLearning Conference for alerting Bright Ideas to Clipmarks.

SemanticScuttle

SemanticScuttle (based on the previous incarnation Scuttle) is a bookmarking tool that can take the ‘social’ part away. That is, you can install SemanticScuttle on your school server if you are concerned about any of the ‘social’ (or lack of privacy for students) aspects of other social bookmarking sites.

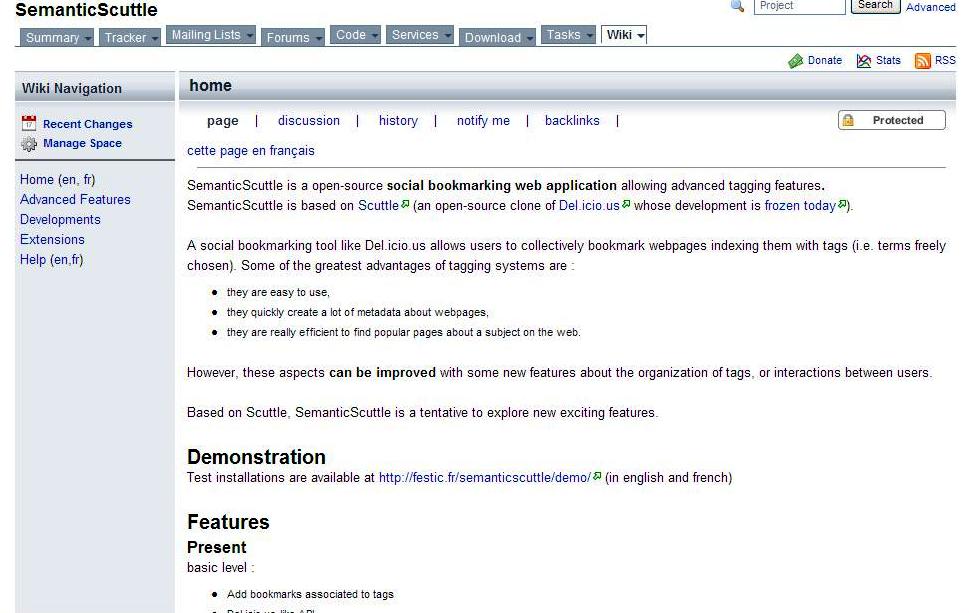
There is more information about SemanticScuttle on their wiki.

SemanticScuttle wiki

SemanticScuttle wiki

For schools that are concerned about cybersafety, SemanticScuttle could be a good introduction to the skills of using social bookmarking tools without any of the stress that comes with connectivity to the outside world.

Diigo

Diigo (pronounced Deego) is a Web 2.0 tool that lets users bookmark, highlight  and add sticky notes to web pages. You can add and share (or not share if you don’t want to) annotations and get recommendations from other users. You are able to publish easily from Diigo to your blog or email and all references will automatically appear. That’s a huge bonus in this day of plagiarism. Diigo even call their tools ‘the best companion for online research’ and that’s a big call. Is it warranted?

Diigo

Diigo

The Diigo blog states ‘We are happy to announce the release of Diigo Educator Accounts, a suite of features that makes it incredibly easy for teachers to get their entire class of students or their peers started on collaborative research using Diigo’s powerful web annotation and social bookmarking technology.’ You do have to apply to Diigo for an educator account upgrade and it can take up to 48 hours for them to process your application (you have to fill out how/why you want to use Diigo in your school).

Diigo has to be downloaded to your toolbar, but it is a very quick process. Diigo says, ‘Once approved for a Diigo Educator Account:

  • A teacher can create student accounts for an entire class with just a few clicks (and student email addresses are optional for account creation)
  • Students of the same class are automatically set up as a Diigo group so they can start using all the benefits that a Diigo group provides, such as group bookmarks and annotations, and group forums.
  • To protect the privacy of students, student accounts have special settings which only allow their teachers and classmates to contact them and access their personal profile information.
  • Ads presented to student account users are limited to education-related sponsors.’

Sounds like it’s worth a look and a trial with a class. Anything that helps students research and acknowledge sources is worth pursuing. Have a look at the video that explains how Diigo works: How to use Diigo. And thanks to John Pearce of Salty Solutions for this guide to Diigo.

Furl – social bookmarking tool

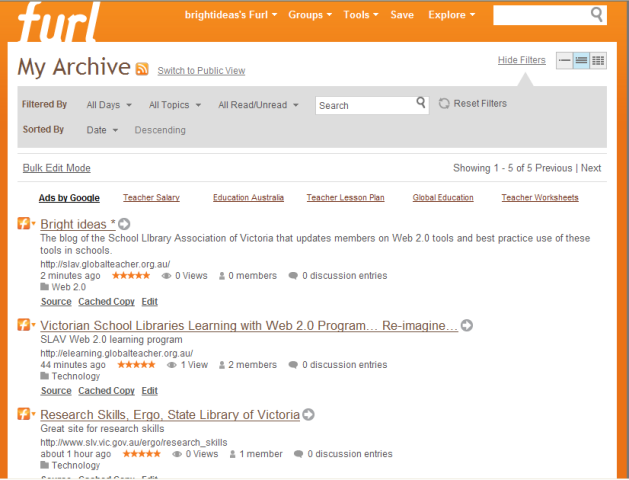
If you like del.icio.us, then you’ll also like Furl. It is a social bookmarking site that allows you to save and archive webpages, rather than just the URL. So if a webpage has changed, you still have access to the version you saved. You can also carry out full text searches of your bookmarks via your archive; you don’t need to click into the webpage that you had previously saved.

Furl page

Furl page

If you use Firefox as a search engine, you are able to add a Furl icon to your Firefox toolbar. Once you have logged into Furl in the morning, any webpage that you come across during the day can be quickly saved to Furl by clicking the Furl icon and adding a few details. It’s that easy!

Instructions to add Furl to your Firefox toolbar:

  • 1. After installing the extension, go to the [View] menu and select [Toolbars].
  • 2. Choose [Customize…].
  • 3. Scroll down until you see the two Furl buttons, drag them to your toolbar,
  • 4. Click the [Done] button.
  • 5. You’re now ready to start Furling

Furl calls tags ‘topics’. You can also add comments, rate the website using a star rating and add your own keywords for easy searching.

You can also subscribe to RSS feeds, such as the Bright ideas one, so you don’t have to check back to see when a post has been added.