A favourite gets even better- Padlet

One of our favourite online tools is Wallwisher, which we’ve written about before.  It’s a simple site that requires no login, and allows anyone to add sticky notes to a virtual wall. It’s perfect for brainstorming and collaborative work, or just as a simple presentation tool for collating links, text and pictures. But good news has come through recently that Wallwisher has become so much more. The site has a range of new features that make it even more useful without sacrificing ease of use. With these changes comes a new name- now the site is known as Padlet.

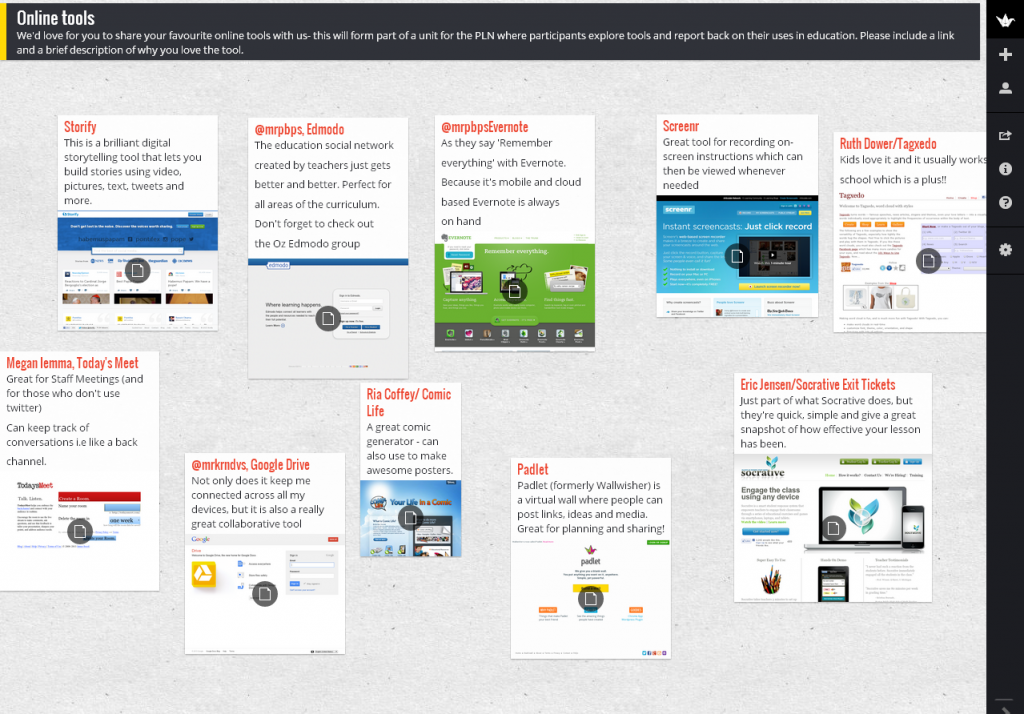
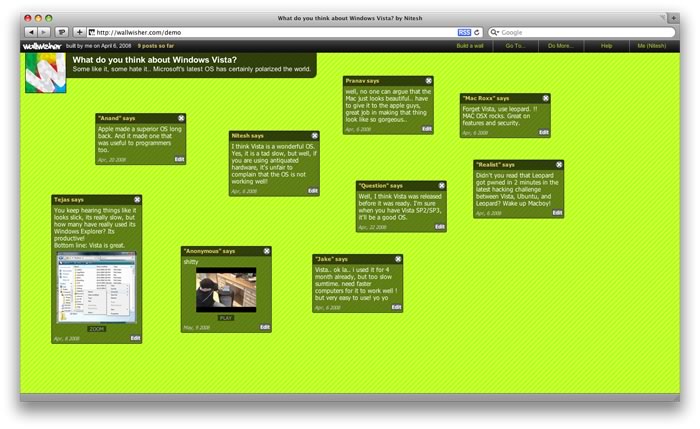
Padlet lets users add text, links or images as virtual sticky notes

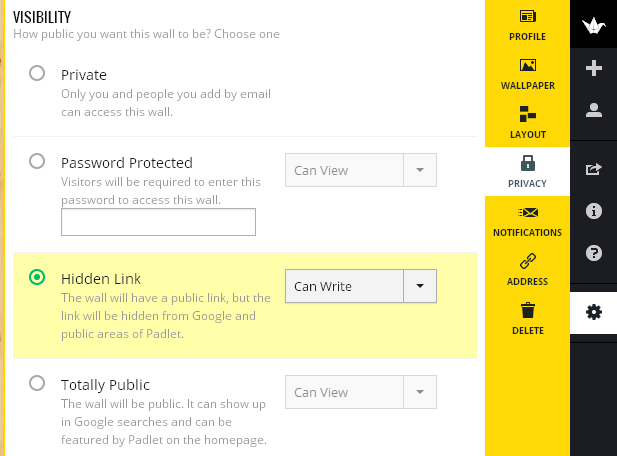
The new features mean that walls can be created with a number of new layouts and backgrounds. There are a range of options for group collaboration and visibility of walls. You can create walls that are completely open or you can choose to moderate comments before they are posted. Walls can also be password protected for an extra layer of security. One great aspect of Padlet is that you don’t need to have an account to create or contribute to a wall, though if you want to create a number of walls then having an account is a good way to keep them organised. To find all of the customisation and sharing options, create a new wall and then select the cog icon that appears on the right hand menu.

A range of customisation and sharing options are available (look for the cog icon)

Other new features include an option to have each new post on a wall appear in a stream (rather than the default layout that has notes spread randomly over a wall). As Richard Byrne points out at his fantastic Free Technology 4 Teachers blog, this feature means that Padlet could be used as an easy way to set up a simple blog for a student or group. Richard is obviously a big fan of Padlet, as he’s also posted about the handy new feature that allows the content of a wall to be exported as a PDF or an Excel file  (on a side note, Richard’s blog is well worth following if you don’t already). Padlet also allows for some rather complex functions, such as the ability to add mathematical formulas using LaTeX codes.

In a time where we are seeing a number of tools closing down, it’s great to see a site like Padlet actually gaining useful features. There is actually a fascinating story behind the development of the site, and it augers well that the developers have plans for improving Padlet even more. They’ve certainly taken great strides with recent updates, as Padlet retains all of the charm and ease of use of Wallwisher, but adds some very handy new features that makes it an invaluable tool.


Make a digital mural with Mural.ly

Mural.ly is an interesting new site that lets users create a digital mural using images, videos, web pages and diagrams sourced from any website. While there have been other sites that have similar features to Mural.ly, it is definitely worth a look as it combines a number of great features from other web tools.

At first glance Mural.ly looks like a cross between Glogster and Wallwisher (which recently changed names to Padlet). You can pin items to a large virtual wall by either uploading the items, entering the url of the item or dragging the item into the Mural.ly window. You can also search Google Images from within Mural.ly, and connect your Google Drive account to add items from there as well. There are also inbuilt symbols, stickers, sticky notes and text boxes that can be added to your board. Several graphical organisers are also provided as templates. At this stage the graphic organisers tend to be more business focused, but hopefully some educational based templates will be added over time.

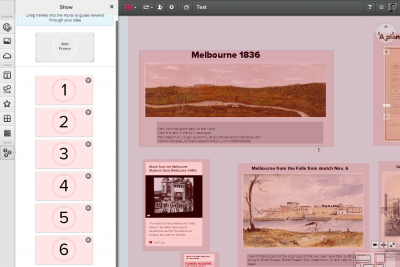
Where Mural.ly really sets itself apart from other virtual pinboard tools is the Frames options. This lets a user define the areas of the board that viewers will see in sequence. It works in a similar way to Prezi, one of the popular zooming presentation tools. Viewers can then click through and be taken on a tour of the elements of the board. Any interactive elements like videos or web pages can also be viewed from within the Mural.ly site.

By defining frames on your board you can tour viewers through your presentation.

Overall Mural.ly is an easy to use site with a wide range of educational applications. It could be used as a shared planning space, a presentation tool or as an inspiration board for a piece of writing (in a similar way to the Story Scrapbook tool). The ability to define frames also means that a board could serve as a way of telling a digital story, such as an animated timeline or a multimedia story.

Mural.ly is still in beta, meaning that you can expect a couple of minor bugs (particularly when zooming your board). It might not be ready for an entire class to use just yet, but I’d definitely recommend having a look at the introductory video below and exploring the site. You can also see a sample mural we built.

Mural.ly doesn’t do anything particularly groundbreaking, but it does take some of the best features of other web tools and puts them all into a very attractive package.

Clairvaux Library wiki

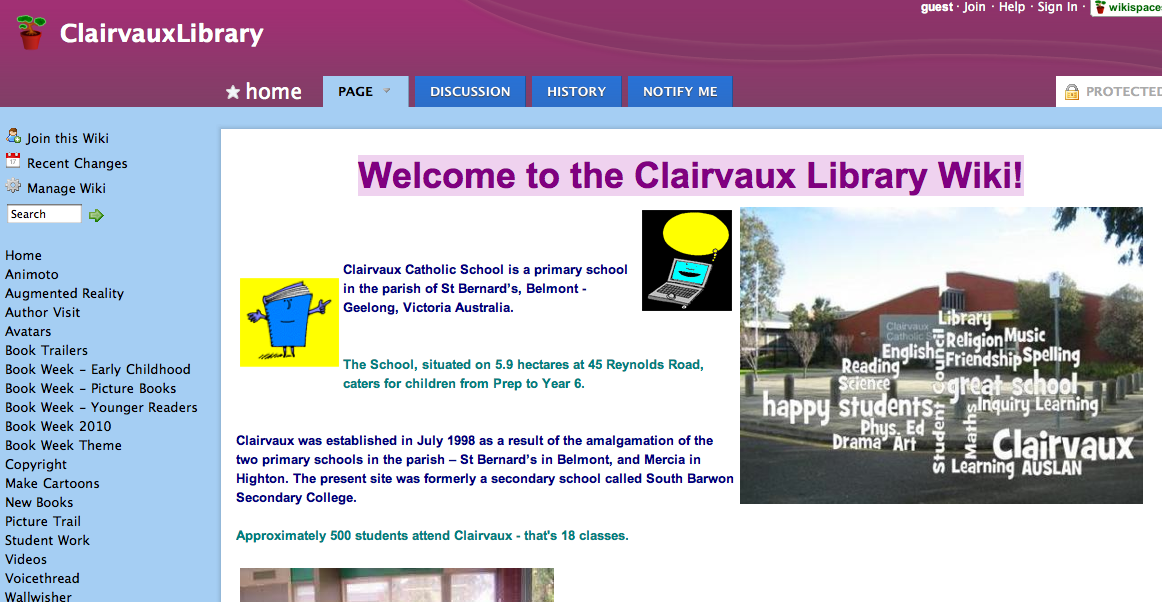
Clairvaux Catholic Primary School teacher librarian Pam Niewman has shown what a fantastic educator she is by developing this brilliant wiki in a very short space of time.

Screen shot 2010-10-30 at 6.52.30 AM

Pam explains

The wiki is the backbone of my teaching at the moment and it develops along with our needs. It’s very primary orientated and by no means complete  – it even gets some things deleted/changed at times. However, like a tap dripping slowly, Web 2.0 is filtering throughout our school . . .

We are still continuing small steps at a time.

The wiki is gradually becoming a very useful tool and something that the children are beginning to refer to and use on a regular basis. I often use it as a teaching tool in my lessons from Prep to Year 6. The children have a link to it on our MyClasses page and the staff have a link on their desktop.

The use of the wiki and various web 2.0 tools is beginning to filter throughout the school – in addition to work done in library classes, we’re up to about 90 children now who have engaged in some form of after hours activities as either creators or responders. I’ve had many emails – some requiring advice, some informing me of what they have done or sending me links, and some just communicating about things they are enjoying.

As more children are beginning to show an interest in displaying their work on the wiki I have decided to set up a Student Work page in addition to incorporating their work into other appropriate pages.

Recently some Book Week activities created some learning opportunities.

  • Children began emailing to be the first to answer a question a day about a shortlisted book. This question became hotly discussed as children tried to be the first online with the correct answer. (Side effect – Use of email improved particularly with younger children)
  • Wallwishers which I set up to discuss the Book Week theme and related activities created interest with the Seniors, who then began creating their own. These were posted on MyClasses and the wiki and the discussions began . . . and then more …and more . . .  They added videos and websites  (Side effect – online mentoring, classroom teachers added comments, good questions had to be developed)
  • Some children who saw my Book Week ToonDoo cartoon tried some out for themselves and emailed their link to me.
  • A few children found a link to Picasso Head on the wiki (via Schumann the Shoeman activities) and tried it out.
  • Book Trailers – Two Year 4 boys created a book trailer for visiting author Justin D’Ath. A number of children who saw this on the wiki now want to try creating their own.
  • Screen shot 2010-10-30 at 6.53.37 AM
  • A year 4 girl wrote and published on the wiki an excellent biography of Justin D’Ath, based on a talk he gave to her class during Book Week.
  • Some children have begun adding book reviews.
  • During their Inquiry unit, two year 6 boys made a web page to make people aware of the plight of the children in the Pakistan floods. A link to this was put on the wiki.
  • As a spin off from these activities, I now have lots of evidence for assessment and report writing.

There is a growing awareness and some curiosity now amongst the staff about Web 2.0 and I have been asked to do some PD and share ideas with the staff next year. As well, I have the opportunity to further develop both my own and the children’s web 2.0 skills next year in my teaching. I think the wiki will develop according to the paths we take and the tools we explore.

My goals for next year are to continue learning about Web 2.0 so that I can provide opportunities to embed the use of appropriate Web 2.0 tools in the learning and teaching of students and staff in our school.

Pam points out that she is by no means an expert (I think she is) and that she is experimenting with the development and use of the wiki. I think she’s done a brilliant job and I am sure the wiki will continue to grow and evolve over time. Please take the opportunity to browse through Pam’s wiki. It is truly amazing what she has accomplished in a couple of terms.

Wallwisher

Wallwisher is quite a useful tool for both classroom teaching and feedback from whole school professional development/staff meetings.

wallwisher-screenshot-700

Anything you can do with Post It notes can be replicated in Wallwisher. Tom Barrett (@tombarrett) provides some great examples of how Wallwisher can be used in the classroom.

Wallwisher

Wallwisher seems like it could be another very useful and easy to use tool.

Who am I? Rowville SC is a SLAV/Connect Web 2.0 winner!

Michele Berner, English teacher and e-learning coach and Katherin Grelis, Teacher Librarian at Rowville Secondary College have developed a winning way with Web 2.0.

As joint winners of this year’s SLAV/Connect Web 2.0 competition, Michele and Katherin have devised an exciting and engaging unit of work using a number of Web 2.0 tools. Michele explains: 

I teach a Year 7 class for English and Information Technology. I wanted a project that would incorporate both English language skills and competencies and would integrate ICT. With the help of Katherin Grelis, a teacher-librarian, we developed a unit that would answer the following questions:

 Who am I?

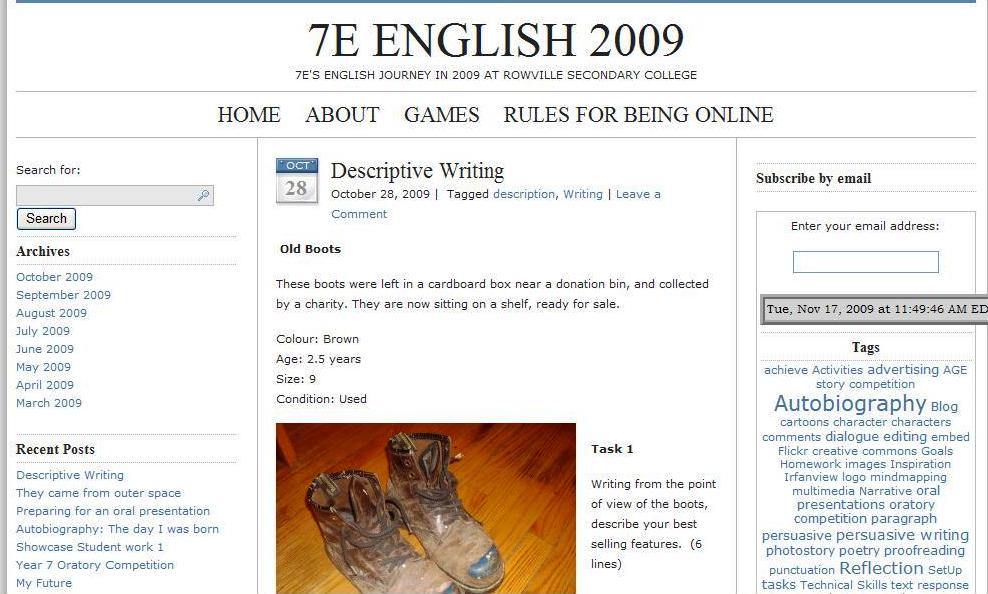
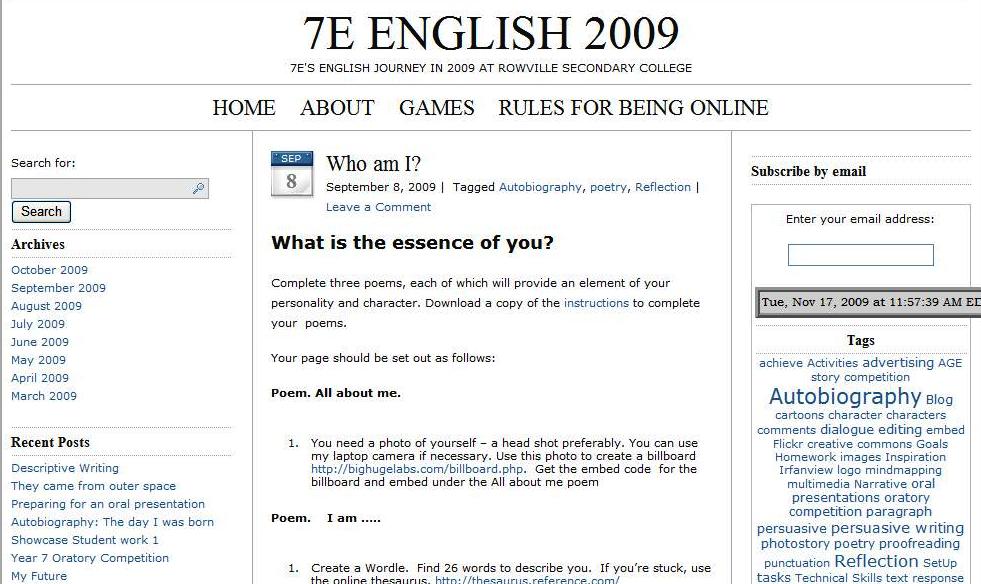
Class blog: http://7eenglish.globalstudent.org.au  Student blogs are linked from here.

What is the essence of me? Where did I come from? What makes me who I am? Where will I be in the future?
 Rowville SC 1

What happened in history? 

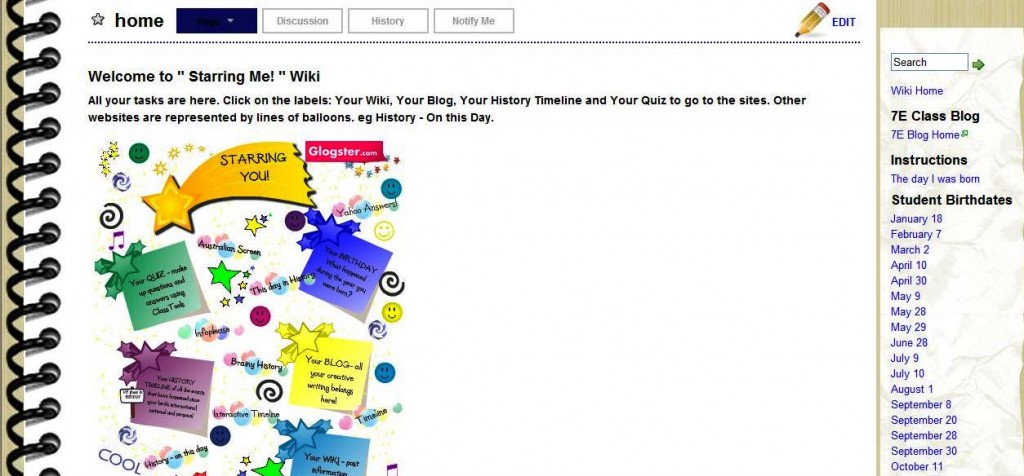
What significant events occurred on the day and year I was born?

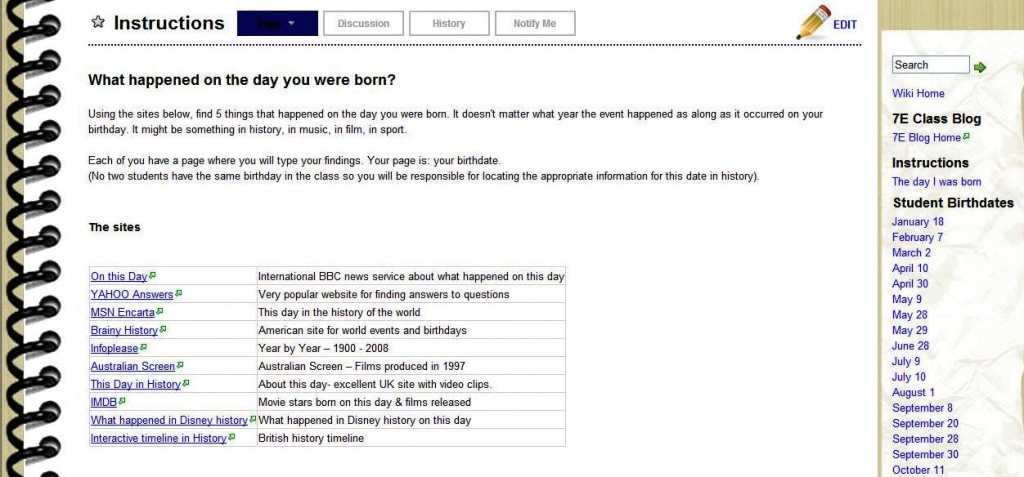
Class wiki:  http://starringme.wikispaces.com/
Rowville SC 2 

 During the year, 7E English was introduced to blogs and wikis as an integral part of their coursework. There is a class blog: http://7eenglish.globalstudent.org.au and each student has their own blog linked to the class blog. Students spent some time at the beginning of the year setting up their blogs and learning to post, tag, comment etc. Students have completed a number of writing tasks on their blogs. I found this to be an effective way of developing student prewriting, drafting, writing, editing and evaluation throughout the year.  
 Rowville SC 4

The Web 2.0 competition was a good opportunity to develop student skills in a variety of Web 2.0 tools, to gather photographs and other evidence and produce information that linked to their study of the autobiography genre.  This would therefore make the online history a more complete representation of the student. The class blog has a number of tasks designed to build up a personal picture of the student:  in effect, to  answer  the question of who am I?   Students set up pages on their blog and all their writing was posted there. The table below outlines the tasks students completed.  Each task also used ICT by requiring students to take images, edit them, use a web 2.0 tool, upload and embed, and demonstrate appropriate file management.  

 An instruction booklet was provided to students which outlined all the tasks and the websites they were required to access. A copy of this booklet,  the unit planner and other  relevant files can be downloaded from the class blog.  

 These are the tasks the students completed for the project. They created pages on their blogs where each task was posted.  

Who am I? 3 poems: About me, I am….. My bedroom Billboard. Bring in a headshot photo of you and create a billboard using http://bighugelabs.com/billboard.phpWordle –  Describe your personality – one word for each letter of the alphabet. Make it into a wordle. 
My Interests Explain in detail your favourite things in life and why you consider them to be your favourite. Photos of  interests Collage – bring  10-15 personal items (eg photos, medals, trophies and scan them on the photocopier to create a collage of you. Save it as .jpeg image and post on the page 
This is me Open ended sentences. Using the site, Glogster, create a glog – multimedia poster which incorporates different elements of your personality and character. It can include music, photos, text, video. When you look at the finished Glog,  what should emerge is “You”. 
My Memories Provide three memories for each of the following sections. Memories of long ago. Memories that make you laugh. Memories that make you cry. Memories that are warm. Memories that are precious.  
After filling in the blanks for Task 1, pick one from each category and write a 4-5 sentences describing each one.
Create a Memory wall using the program Wallwisher: http://www.wallwisher.com/ 
My Family 6 photographs – family /pets. For each photograph, write 5-10 lines explaining the importance of  your family member or pet to you.  Photocube 3d:  http://www.photocube3d.com/  
My Future Letter to YOURSELF and tell yourself things that will happen in the future to yourself. Here are the topics you are to write about…:•  Something to look forward to…•  Something to watch out about…•  Something/someone to avoid…•  Something to work hard at…•  Someone to be especially nice to…•  Someone to really listen to…•  Somewhere to be sure not to go… 
What happened on the day I was born What happened on the day I was born? What events occurred in the year of my birth? What happened on the day I was born? On the wiki site:  http://starringme.wikispaces.com/, each of you have a page where you will type your findings. Your page is: the date of your birthday (No two students have the same birthday in the class so you will be responsible for locating the appropriate information for this date in history). 

  1. Join the wiki using the username and password provided.
  2. Using any of the sites below, find 5 things that happened on the day you were born.   It might be something in history, in music, in film, in sport.
  3. When you find something interesting, follow the link and read the information. 
  4. Edit your page.
  5. Write a brief summary (5 -8 lines) on the event that happened and save your page
  Task: QuizUsing any of the events from the wiki, you are going to generate a quiz which includes 10 questions based on the information collected in the Wiki. Look at each of the dates on the Wiki, find something that interests you and create a question from the information. Also provide the answer to your question. 

Step 1:  Planning: Create a three column table in WORD.             

Question Answer Wiki page  information comes from


Step 2:  Create the quiz.  See class blog for further instructions

Step 3:  Put your name as the author of the quiz

Step 4:  Obtain the embed code for your quiz.

Step 5: Embed the quiz on your WIKI page


Link to the quiz generator

http://classtools.net/main_area/template_loader.php/?quiz


Instructions on how to use the Quiz generator

Skills Developed

Students should develop skills in the following:

  • Interpret, analyse and evaluate information on  a student’s life (past, present and future) with the assistance of technology
  • Read and follow multistep directions to  complete a complex task
  • improve technical skills by using web 2.0 tools to  publish elements of their life
  • evaluate their own work.
  • create appropriate graphic organizers to provide a structure for information
  • apply the writing process to write effectively in various forms and types of writing
  • Locate and use multiple resources to acquire relevant information
  • evaluate reliability of information
  • record relevant information using a variety of note-taking and organizational strategies
 Rowville SC 3

 Implementing the project

The project was completed in English and IT classes for a period of 4 weeks. Year 7 students are not the best at following instructions on handouts so it was often hectic and students were completing different activities in the booklet as they worked at their own pace. As students completed some of the ICT tasks, they assisted other students which worked well. 

 Continuing use of the unit

During Semester 1, Yr 7 English study Autobiography.  In 2010, English teachers will be able to use the Who am I / Starring Me unit to study this genre whilst the ICT and Web 2.0 skills that accompany each task can be taught during the class’ Information Technology classes.  

 The  project will also form part of  our ICT showcase; demonstrating to teachers  how to integrate ICT into a unit of work and how to use blogs as a daily part of the class activities.

What a fabulous unit of work Michele and Katherin have developed. There is plenty for all of us to take from the tools they have incorporated and the way in which ICT has been embedded into the unit of work. The beauty of blogs and wikis is that they can be tweaked and updated year to year without having to reinvent the wheel entirely. As new tools become available, they too can be incorporated into the unit.

Congratulations to Michele and Katherin for their SLAV/Connect Web 2.0 competition success. It is obvious that it is well deserved.