So far in our workflow series we’ve looked at ways to stay organised and keep track of valuable resources we find online. We’ve managed to triage our reading, made sure we have somewhere to store important resources forever and whipped our bookmarks into order. In this final post of our workflow series, we’re going to look at the last stage of our workflow process, reflection.
Reflect
The act of filtering information, saving for later and sharing within our network are important steps in organising ourselves and helping others. But for all of these tasks to be really valuable it’s important to now use what you have read and collected to reflect on the thoughts of others and share your own ideas.
Just as a teacher wouldn’t accept a list of links from a student as an assignment, actively reflecting on what we collect helps crystallise our thoughts and contextualises the resources you share. Whether you are giving a speech about a topic, writing course materials or putting up a post on your blog, reflecting and sharing adds value for you and others.
One of the best ways to reflect on what you find is in a blog post. Blogs are a flexible and relatively easy way of publishing online, and the advantage of a blog for reflection is that it allows you to hyperlink to any online resources. In that way your blog not only becomes a way for you to collect and curate links, but also a way for you to tie them together and add your own reflections as well.
How to get started with blogging
- Choose a blogging platform. Victorian educators (in State and Catholic schools) can get a free blog through Global2 -this is the platform that Bright Ideas uses. For all other educators Edublogs is a great option, and the wonderful team at Edublogs provide great technical support and are on hand to help you. Of course, you could use other blogging alternatives like WordPress, Tumblr & Blogger. But if you’re looking to create a professional blog or are planning on blogging with students as well then then Edublogs and Global2 are the best options, as they handle comment moderation really well.
- Have a look at the fabulous resources at the Edublogs Kick start your blogging page to learn about posting on your blog, adding pages and adding media or links to posts
- Include an About Me page describing who you are and your interests. It will help you connect with other educators.
- Aim to regularly post on your blog. It’s a great record of professional reading and learning, so get in the habit of reflecting on your blog and including links to the resources you’ve accessed. Remember that you must own anything that you post on your site, so don’t upload copyrighted material. But linking is great!
- When you make a new post, be sure to share it on social media or via social bookmarking. You might think no one wants to read your posts, but sharing is important and we’re sure that people will be interested in what you have to say.
- Keep an eye on comments that appear on your blog. You will have to moderate them- this means you can approve them before they appear on your blog, or delete them if they are inappropriate.
- Follow other interesting blogs using an RSS reader. This brings all of your followed blogs together in one place and makes it easy to see new posts. It will also be the way that other people can follow your blog. Feedly is a very nice RSS reader that works in all browsers and includes some great mobile apps. It also integrates really well with tools like Pocket, Evernote, Twitter and Diigo.
An extra step- tying everything together
So now you’re set up with some great tools that will help you through the five stages of workflow. You have places to organise your reading, collect and share links, store resources, and reflect on what you’ve found. Most of the tools that we have explored tend to integrate well with each other, so for example you can send an interesting article directly from Feedly to Pocket. Once you’ve read that article in Pocket you could tweet about it or bookmark it in Diigo. Or you could save it to your Evernote account.
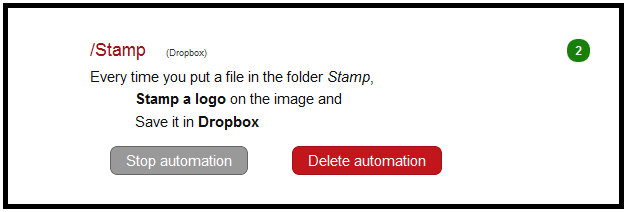
Sometimes these options aren’t available, so you may need to explore an automation tool like If This Then That. This service lets you connect up your online accounts and then create recipes that will automate tasks. As an example, you could tell If This Then That to make a new bookmark in Diigo whenever you archive an item in Pocket. Or you could set it up so that whenever you publish a new post on your blog, that post is also saved into your Evernote account.

If This Then That lets you create recipes that will automate actions between two accounts. This recipe creates a bookmark in Diigo from your Pocket account.
It’s a bit hard to explain, and the best way to learn how it all works is to get in and have a bit of a play. But here’s a guide to setting up an If This Then That recipe.
So that brings us to the end of the worflow series, and hopefully it’s helped you think about how best to stay organised online. The tools we’ve explored are just some of the options available andthere are lots of other fabulous tools that are available online that help you gather, present, share and reflect on what is on the web. Whatever services you decide to use, remember to have a clearly defined set of rules that will help you put that resource in the right spot. Then you’ll be well on your way to feeling just that little bit more organised.
Image credit: J. W. Lindt (1880) New Wallan deep lead gold mine, Vict., State Library of Victoria


