Film and video resources: Making History & 15 Second Place

Today’s guest post comes from Heath Graham, Education Officer at the State Library of Victoria. Heath explores two sites designed to help students create special kinds of online videos.

In 2010 – 2011, Innovation and Next Practice at the Department of Education funded the development of a range of highly engaging and interactive online educational resources from cultural institutions around Victoria. The focus for these projects was on content production by students, for sharing with their peers and the wider community. Two of these projects allow for online video creation. They are Making History and 15 Second Place.

Making History
Museum Victoria’s Making History is a resource for producing and sharing digital histories. Digital histories are short digital stories based around an historical inquiry. Students choose a topic, conduct their research, then produce and upload their story to the site, where it can be viewed and commented on by members of the community.

The site offers four broad themes for students to follow:

  • Living with Natural Disasters,
  • World Events; Local Impacts,
  • Cultural Identity; Migration Stories
  • Family and Community Life

These topics are broad enough to find a home in many parts of the history curriculum and allow great opportunities for students to conduct some original research.

Student research is well supported by Making History. Videos and tutorials from professional historians and museum curators cover each of the themes suggested by the site, as well as more general videos on oral history, conducting an historical interview, storyboarding, filming tips, and guides on how to upload your finished story.

Making History also has a space for students to upload and share their work with the community. Users can comment and give feedback on the videos. Digital histories uploaded to the site range form grade three to VCE, and the focus is from myths and legends to the story of a German immigrant coming to Australia after World War II.

15 Second Place

ACMI’s 15 Second Place allows students to create and share very short films that capture the mood or theme of a location. The films are geotagged, so they can be linked directly to the place they were made. The recommended length for these films is only fifteen seconds, which might seem impossible, but it’s well worth checking the site out and seeing how much you can capture in that time.

Fifteen seconds is not enough time to develop a narrative, but it is long enough to give a sense of place, capture a particular mood or tone, or address a theme. The site has several suggested themes that you can use.

Films can either be shot onsite with a mobile device and directly uploaded from the free iOS app, or they can be uploaded via the website. Once they have been shared, they can be viewed through a map interface on the site. The videos are geotagged (this happens automatically if uploaded from the app), and other tags can be added as well. Other users can comment on videos they have viewed. They can also follow other creators, mark favourites, and share to other networks.

The 15 Second Place site contains teacher’s notes and support material for using the site effectively with students. Also included are curriculum links, activity suggestions and a link to the ACMI Educator’s Lounge.

These projects are all accessible through the FUSE educational portal.  All FUSE content can also be found through the Ultranet under the Resources tab.

Bright Ideas user guides

While we’re always looking out for great new web tools here at Bright Ideas, we know that sometimes it can be difficult to have the time to learn how to get the most from a new tool or service. To help you along we’ve recently launched several user guides which will help you get started with some of our favourite tools.

You’ll be able to find all of the guides in the menu bar at the top of the site, or on our Guides page. All of the guides have been built using Storify and feature either screenshot or video tutorials to guide you along. We’ve aimed to keep the video tutorials to no more than 90 seconds each so you are able to quickly find the tips you need.

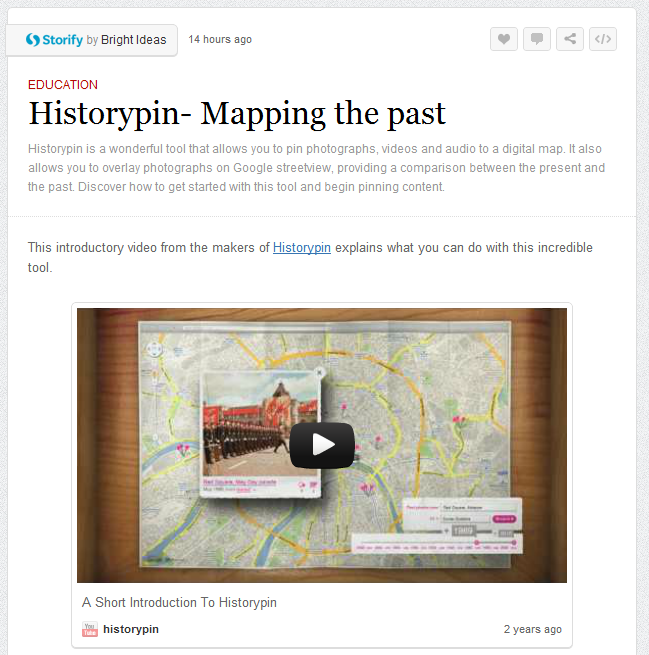
The first video guides are for Historypin and Twitter (both getting started and taking Twitter further). We’ll be adding more user guides over the coming months and would love to hear you feedback or requests for other guides that you’d like to see here.   Next we’ll be adding guides for Evernote, Diigo and  Twitter apps like Hootsuite and Tweetdeck.

We’ll keep you posted about new or updated guides here and on our Facebook page, so follow us there to stay up to date. You can also keep track of any new video tutorials by subscribing to the Bright Ideas Youtube channel.

Feel free to let us know about any other guides you’d like to see here on Bright Ideas.

Archive tweets with Tweetdoc

Twitter has been adopted by many teachers as a professional learning tool, allowing access to an incredible network of educators through hashtags such as the Victorian PLN (#vicpln). One of the benefits of tagging tweets with hashtags is that it allows for conversations around particular areas of interest or at conferences. An example of this is at the School Library Association of Victoria conferences, where the #slavconf hashtag allows attendees (and those participating online) to join the conversation. But while this is an incredibly powerful feature of Twitter, it can be difficult to archive all of these tweets for future reference. This is where Tweetdoc comes in.

Tweetdoc allows you to create a document listing all of the tweets based around a particular search. The document also displays a grid of all of the users who tweeted using the hashtag. We’ve used it archive tweets from several events and while we’ve discovered a couple of drawbacks- such as occasional bugs and no ability to filter spam tweets- overall we have found Tweetdoc to be a very useful tool.

Here’s how to create a Twitter archive using Tweetdoc. You can see the sample document produced in this tutorial here.

Make Lego creations in Build with Chrome

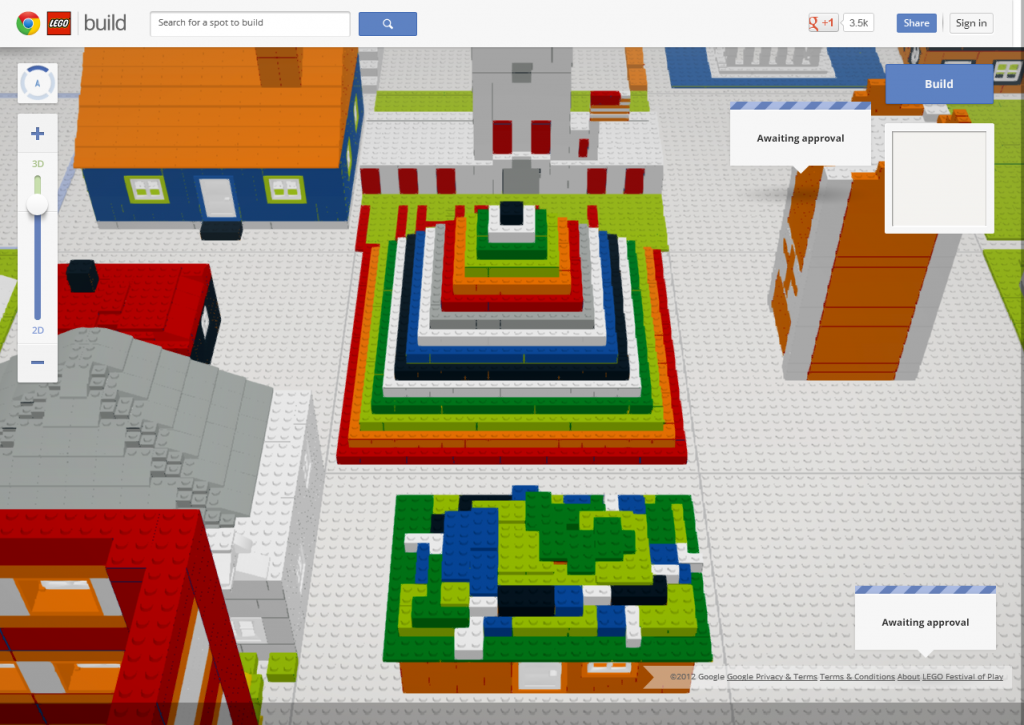
Many of our readers might be relaxing on school holidays and some of you could be looking for a great tool to keep the kids (or yourself) entertained. The Build with Chrome app allows you to stake out land on a map and then build your own virtual Lego creations. There have already been some fantastic creations built.

The app is only available in Google Chrome though you can view the map in other browsers. This may create some problems for work computers that are still limited to using Internet Explorer. It’s another great reason to lobby for the freedom to install other browsers on your computers.

Building does require logging in and at this stage the creation must be built and published in one session as you can’t save a work in progress. Buildings also require approval before they are published which hopefully means that innappropriate structures can’t be made.

But the best part of Build with Chrome? You can play with Lego to your heart’s content without having to experience the pain of stepping on a block with bare feet!

Build with Chrome

Screenr: a free screencasting tool

During his keynote speech at the recent ICTEV 2012 conference, Alan November explored the value of screencasting in education. He had spoken to a student about why they preferred to learn from a video made by another student or their teacher, instead of having a teacher explain concepts on a whiteboard to the whole class. They student told him that learning this way was great because “my teacher doesn’t have a rewind button”.

The popularity of the flipped classroom model and sites like Mathtrain or the Khan Academy show that viewing and recording instructional videos is a great way to supplement and support learning. Teachers might record short videos about key concepts or students could record their process for completing a task. Having a student consider how best to teach a concept or procedure reinforces their own learning. There are great apps like Educreations that work as a virtual whiteboard to be recorded and shared. We’ll explore this tool in a future post.

For recording video of your computer screen we recommend Screenr. This free service is stable, requires little installation and allows you to easily publish to the web or save your files for later viewing. You can also log in with a Google or Twitter account so that’s one less password to remember. It does require an internet connection while you record, so if this is an issue then you might try a free program like Jing instead.

To get started, have a look at our screencast about Screenr below. (3.25)

Permission slip

Those of you who follow the Victorian Police Twitter account may have noticed over the weekend an odd tweet about a magical weight loss technique. Most followers would have picked up straight away that the tweet was from someone who had gained unauthorised access to the Victorian Police account and the police moved quickly to inform followers and delete the tweet. (You can read more in this article about the tweet, with obligatory donut reference.) To see an official and trusted account accessed in this way is a timely reminder of the importance of keeping your accounts protected.

We’ve probably all received strange tweets or emails from our contacts, usually with a message that “This user is saying nasty rumours about you” or “I saw this photo of you and I’m laughing so hard” with a link to a malicious site. Because so many tweets share links using URL shortening services it can be difficult to see if a link is trustworthy just by looking at the address. Our tip would be to only open links from trusted sources, and make sure they have some context provided rather than just a general message like “I saw this site and thought of you”.

Twitter in particular seems susceptible to the problem, possibly because of the ability to connect a number of third party applications to your Twitter account. Being able to log in to different services using your Twitter account is very handy, meaning you don’t have to remember multiple passwords and making it easier to share links with one click. But the side effect can be that you are handing over partial control of your account. When you authorise an external service to access your account make sure that you read what the service will be able to do, and only authorise if you feel comfortable and trust the service.

Even if you have given permission to access your account, you still have the power to revoke access to an external service at any time. In order to secure your account and not see your followers or friends spammed with annoying or dangerous messages, we recommend doing a bit of housekeeping. Have a look at the services linked to your accounts and revoke permission to any that you aren’t using anymore or don’t trust.

To help you out, we’ve put together guides below to revoking external access to the three main accounts that you might use; Twitter, Facebook and Google.

Guide to revoking access to your Twitter account

Guide to revoking access to your Facebook account

Guide to revoking access to your Google account

Wunderlist- a free to-do list manager

We’re big fans of any tools that help us stay organised here at Bright Ideas. There are plenty of to-do list managers out there but our favourite service is Wunderlist.

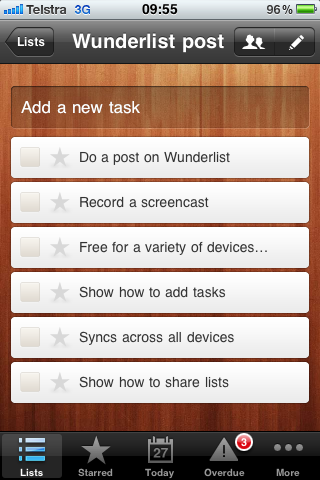
Wunderlist is available for free on Mac and PC as well as a wide range of mobile platforms. It synchronises seamlessly across all of your devices, so lists can be created on your computer and then checked off on your phone. You can also keep track of tasks by setting importance or due dates.

One great feature of Wunderlist is the ability to create a number of different lists, so you can view tasks based on one project or see all of your upcoming tasks in your inbox. As soon as you check off a task it will be greyed out, then later it will disappear from view to keep your lists tidy.

If you love pen and paper you can print off your lists and you can share a list via email for others to contribute to your projects. The developers have also released a more comprehensive shared project management tool called Wunderkit which we’ll explore in a future post.

While some people will still feel that the best list management tool is a pen and paper, we find that being able to set alarms on tasks within Wunderlist helps us stay organised. And you’ll get almost the same feeling of satisfaction clicking that little check box as you do crossing off an item on your handwritten lists.

For a guide to getting started and managing lists, watch our screencast below (Best viewed in full screen 2.42 minutes).


Google Research Tool

Google have added an interesting new feature to Google Docs, the Google research tool. When you open up a document you will now see a sidebar which allows you to perform a web search. Results are displayed in this panel and can be quickly added to a document. If you can’t see the sidebar, you can display it by selecting Tools>Research.

We had a look at this new feature this morning, and recorded a quick screencast of our first impressions. Have a look at the video below to see how it all works. The drag and drop features certainly looks to be a time saver and the automatic referencing is also a handy tool.

At this stage only results from Google search are displayed, but we probably couldn’t expect other search engines to be included, could we? We hold out hope that other search options may be included in future versions. Once again, this may again lead to a discussion with students about the importance of cross checking information and using a range of reliable resources.

Despite this minor quibble, Google research tool certainly looks like a handy way to get started with research and to keep track of any resources accessed.

Have a look at our first impressions below.

Getting the most out of Evernote

The 2012 Victorian PLN course has been progressing well, with participants next week beginning Unit 9 of the course. This unit looks at research and referencing with a particular focus on one of our favourite tools; Evernote.

Evernote

Many of our readers tell us that Evernote is the application that has changed the way they work. We’ve posted about it before, but it’s worthwhile touching base again as the developers are constantly adding new functions. The power of Evernote is that it provides a searchable catalogue of your notes which are synchronised across a variety of devices. You can also add voice recordings, handwritten notes and pictures, or clip entire web pages for later.

If you are looking to get started with Evernote feel free to visit the Victorian PLN blog and have a look at the Evernote page, which has some screencasts and tips to get you going.

For those of you who know the basics, a recent article by ReadWriteWeb outlines some of the ways you can make Evernote even more powerful. These tips include how to share notebooks, save web pages or email notes directly to your account. One particularly interesting tip for educators is the ability to disable web syncing on some notebooks so notes are not stored in the cloud. This may be useful if you have sensitive information (such as student data or parent contact details) that you would prefer to only store on your computer. This option is only available when you create a new notebook (see below).


For tips about student use you can read Buffy Hamilton’s great post about using Evernote in the classroom. Remember to share any tips you have in the comments below or on the Bright Ideas Facebook page.


Featured post: instaGrok

Today our featured post comes from Bev Novak, writer of the fantastic NovaNews blog. Bev’s post is about the new educational search site instaGrok, which looks like a very promising tool that includes elements of Google’s now defunct Wonderwheel.

instaGrok – a winner for those who loved Wonder Wheel!
 
The value of social networking is profound!   I’m sure that without it, it would have taken me a while to discover instaGrok
 
instaGrok – an interactive learning tool provides an expansive array of returns for each search.   Producing a spiral visual graph on the left pane, numerous links are simultaneously generated on the right hand panel and are neatly categorized under headings: key facts, websites, videos, images, quizzes and concepts.   With a tab to moderate the level of difficulty of results returned, this tool really has enourmous potential as a teaching tool. The ‘about’ tab on the homepage, also tell us that instGrok
 
  • finds age-appropriate educational content on any topic presented with interactive multimedia interfaces
  • generates quiz questions based on student’s research activity and skill level
  • supports creation of research journals and concept maps for learning assessment
Just take a look at this short video which appears on the instaGrok homepage:
 
 
For those of us who lamented the disappearance of Wonder Wheel – that great tool which simply vanished from the Google suite of tools about a year ago –instaGrok sure looks to be a winner!


You can find the original post here. Make sure you also have a look at Bev’s Book Blog, which features news and reflections on literature and books. Thank you Bev for sharing your work with us.