Can eReaders Encourage Reading?

A recent study from the Pew Research Center focussed on the growing popularity of eReaders. The Rise of e-reading confirmed a significant increase in users – 21% of adults had read an eBook in the past year. Their research also found that eBook readers read more books (both formats) and read more often.

These are the types of results that catch a Teacher Librarian’s attention. Could this also be true for students? Might eBook readers be a way to encourage reluctant readers to read more and/or read more often? This might be the case.

In 2012, SMU conducted a study with middle years students who struggled with reading. They found that eReaders motivated students to read, but there were marked gender differences. While both studies were conducted in America, they are valuable reading for Teachers and Teacher Librarians making pedagogical and acquisition decisions as  Australian schools introduce 1:1 iPad and BYOD programs.

Using screencast software to provide student feedback

In this guest post William King from Brauer College explains how he uses screen-recording software to provide detailed feedback on student work. 

Giving effective feedback is an essential part of the teaching and learning process. The impact of feedback on student achievement has been highlighted in recent years by academics such as John Hattie who gives it an effect size of 1.13. The most successful form of feedback is by giving it face to face with your students, but in a class of 26 or more kids this is not always possible. This is where screen-capture software comes in.

Screen capture software allows you to record as if a camera was pointed at your screen. Using a microphone you can also record your voice to provide a detailed commentary. Jing is a free to download screen-capture tool that allows you to record what is happening on your screen and also to take screen-shots.

When thinking about what comments make it is important to follow a regular structure and I tend to use the Goals, Medal and Mission approach as suggested by Geoff Petty. Petty stresses the importance of giving feedback that contains real information and not just general praise or encouragement. His structure involves stating:

  • Goals: What the student should have been aiming for, which could include learning intentions or success criteria,
  • Medals: Where they are in terms of meeting those goals,
  • Mission: How to close the gap between where they are now and their goals.

It is important to write down some dot points on each of the above before you begin to prevent constantly having to re-record due to being unsure of what to say.

After installing Jing, look for the sun icon at the top of your screen and select Capture

To use Jing simply download the program. When installed you should have a small sun at the top of your screen. Open up the document that you wish to give feedback on. I usually go through the document and mark it up using the Track Changes feature in Microsoft Word before recording, so that I can see the particular areas that I need to focus on. When you have marked up the piece of work and written down some basic notes it’s time to record. Hover your cursor over the sun and select the prong marked ‘Capture’. Take the Jing arrows and use them to position the recording window over the screen area (containing your document) that you want to focus on. Then click on the video button when you want to start recording. Make sure to use a microphone as this will ensure that your voice comes across clearly so that the student can hear what you are saying. It is important that when recording that you don’t re-read the whole document, but simply hone in on which areas are most important for the student to improve in.

Jing allows you to flick between documents while you are recording so it might be handy to have a copy of the assessment criteria that you can open and refer to if necessary. Don’t open and close too many screens while recording as this can be confusing. Scroll through the document as you speak and use the cursor to point out the relevant annotations. Jing will give you 5 minutes to record your feedback but I wouldn’t use more than three as this is already a lot of information for the student to absorb. When you have finished save it to the desktop or the Techsmith site.

Remember to give students a reflection sheet to send back to you with their comments on what they should be able to improve on in their mission. Jing offers an interesting source of feedback for students and also a means for providing detailed commentary. Plus it can really help if you have bad handwriting!

Thanks to William for sharing his experiences, and to William’s colleague Leanne Hampson for introducing us to his work. William makes use of Jing for recording his feedback videos but there are other free screencasting options such as Screenr and Screencast-O-matic that could be used in the same way.

The method outlined above would also be a great way to provide annotated student work samples for students, or to model writing processes. Let us know in the comments how you’ve made use of screencasting software in your classroom.


A favourite gets even better- Padlet

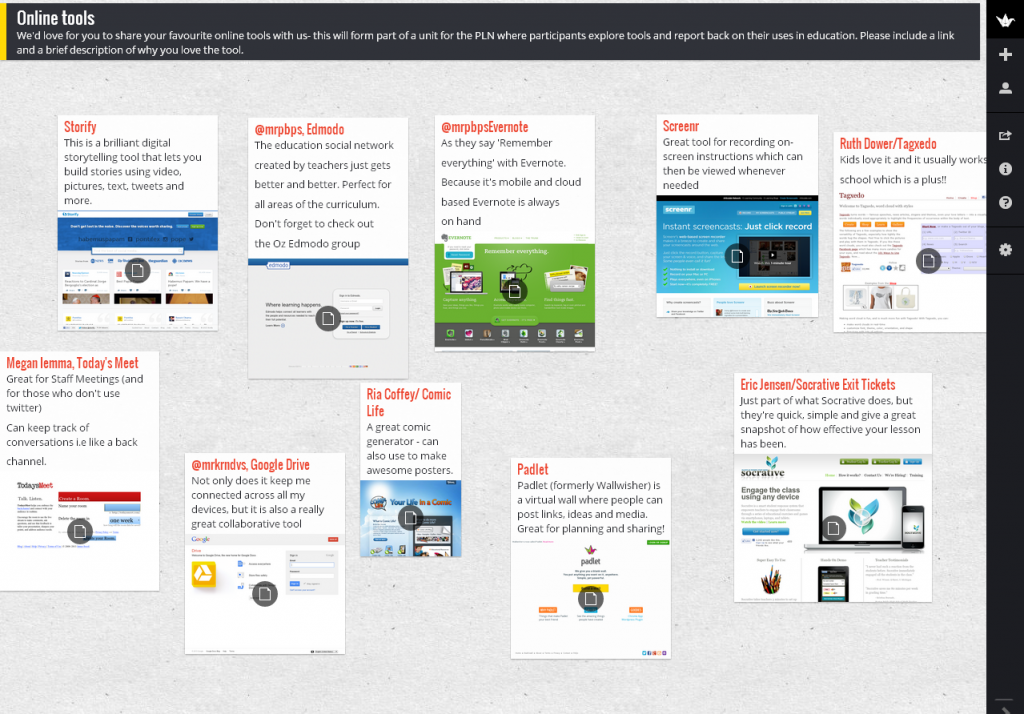
One of our favourite online tools is Wallwisher, which we’ve written about before.  It’s a simple site that requires no login, and allows anyone to add sticky notes to a virtual wall. It’s perfect for brainstorming and collaborative work, or just as a simple presentation tool for collating links, text and pictures. But good news has come through recently that Wallwisher has become so much more. The site has a range of new features that make it even more useful without sacrificing ease of use. With these changes comes a new name- now the site is known as Padlet.

Padlet lets users add text, links or images as virtual sticky notes

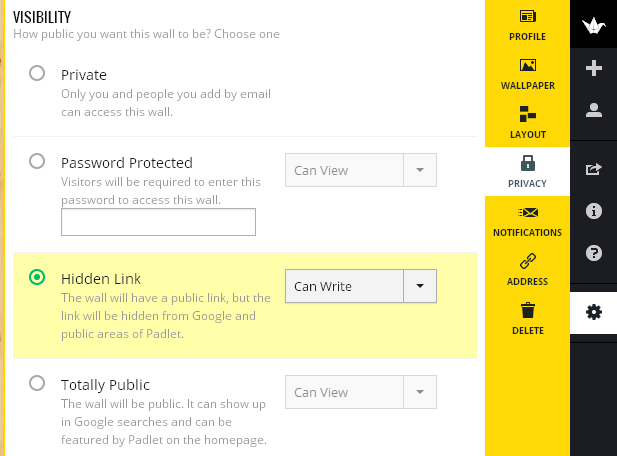
The new features mean that walls can be created with a number of new layouts and backgrounds. There are a range of options for group collaboration and visibility of walls. You can create walls that are completely open or you can choose to moderate comments before they are posted. Walls can also be password protected for an extra layer of security. One great aspect of Padlet is that you don’t need to have an account to create or contribute to a wall, though if you want to create a number of walls then having an account is a good way to keep them organised. To find all of the customisation and sharing options, create a new wall and then select the cog icon that appears on the right hand menu.

A range of customisation and sharing options are available (look for the cog icon)

Other new features include an option to have each new post on a wall appear in a stream (rather than the default layout that has notes spread randomly over a wall). As Richard Byrne points out at his fantastic Free Technology 4 Teachers blog, this feature means that Padlet could be used as an easy way to set up a simple blog for a student or group. Richard is obviously a big fan of Padlet, as he’s also posted about the handy new feature that allows the content of a wall to be exported as a PDF or an Excel file  (on a side note, Richard’s blog is well worth following if you don’t already). Padlet also allows for some rather complex functions, such as the ability to add mathematical formulas using LaTeX codes.

In a time where we are seeing a number of tools closing down, it’s great to see a site like Padlet actually gaining useful features. There is actually a fascinating story behind the development of the site, and it augers well that the developers have plans for improving Padlet even more. They’ve certainly taken great strides with recent updates, as Padlet retains all of the charm and ease of use of Wallwisher, but adds some very handy new features that makes it an invaluable tool.


The danger of a free lunch

Closing Down - Last Day

Closing Down – Last Day by _4cryingoutloud

The imminent closure of popular blogging platform Posterous highlights one of the drawbacks of free online tools. Trusting any online service with your data or even your time in building a site means that it is important to be vigilant and well informed so you are not inconvenienced further down the track.

The development team behind Posterous has been acquired by Twitter, and Posterous is due to close down on April 30th.  This leaves many users looking for another site to host their blog and an easy way to migrate their data. Fortunately in this case there are a number of options for migrating a Posterous site into similar sites like WordPress or Tumblr.  Posterous users will surely miss the easy to use blogging service, but the minor inconvenience of migrating their site is a much better outcome than facing a task of manually exporting data, or worse, losing your data entirely.

In the online world, the theory that ‘there is no such thing as a free lunch’ is clearly evident. It’s an important lesson that should be considered when evaluating the use of any online tools. Many of these services host large amounts of data and require constant maintenance, meaning that all free services still have the cost of providing server space and employing staff. The business models of most free online services tend to loosely fall into the following categories:

  • Building a strong user base and then being acquired by a larger company (as in the cases of Posterous & Instagram). This model probably makes a service more likely to be discontinued. Users can only hope that a service will be acquired and continued (like Facebook’s purchase of Instagram), rather than being acquired merely for the talent of the developers (like Twitter’s purchase of Posterous).
  • Making money by serving up advertising to users. Google, Twitter & Facebook are the best examples, and all three services analyse your data to serve up targeted ads. This has led to some backlash from users about invasions of privacy. However, those with a more reasonable view realise that advertising supports the service. My advice is this, if you use a free service (or even visit a free website) then advertising is a fact of life. The cost of a newspaper or magazine is subsidised by advertising, and the web is no different. Our personal data makes an attractive proposition for advertisers, and if that is a problem for you then it may be best to avoid these sites.
  •  The ‘freemium’ model, which offers premium paid services to power users and limits the features offered to free users (Evernote’s premium accounts and Dropbox’s paid storage upgrades are good examples. Google Apps also falls into this category). In some way this may be the best option for users and providers. Data tends to be better protected, paid users get important features and innovative new features are added as a way of enticing people to upgrade.
  • A fully paid model. One interesting new site using this model is Pinboard, a bookmarking site that is a paid service. The developer promises that this will provide a level of privacy and data protection not found in free services
  • No business model at all and no way to make income from a service. I’d advise you to avoid using any service like this, particularly if investing your time or data (read about the closure of Megaupload as a classic cautionary tale). 

When using any free service, it’s important to consider these models and the implications of storing your data with them. Check out a site like How do they make money? for a guide to the models of popular services. Always read the Terms of Service and Privacy Policy and explore the options for exporting your data before you invest a lot of time and energy into a site (this is doubly important if you are recommending your students use a service).

Every time you commit your data to a site you need to do some risk assessment and consider ways to reduce the risk. For example, if you use a service like Google Drive, Evernote or Dropbox then your data can also be synchronised back to your computer as well, so at least you have a local copy of the data. This is particularly important for files like photographs. Also consider using a tool like If This Then That  to automatically back up your data from one service to another.

Remember to also consider the type of data that you are uploading to online services. Do some research about a service to see if they have had privacy breaches in the past, and think about the implications of the data you upload being accessed by someone else. For example, if you want to use Evernote to record student data then make sure it is only stored as a local notebook on your computer, rather than being uploaded. It’s not as convenient, but it’s an important step in protecting data.

Online services provide an amazing level of convenience, letting us stay organised, share our lives and work together. This convenience does also require us to stay informed and consider our use of these tools. In this way you’ll ensure that you’ll never lose that important data that means so much to you.


Lizzie Bennet Diaries: transmedia story telling

In this guest post Centre for Youth Literature Program Coordinator, Adele Walsh talks about The Lizzie Bennet Diaries – an amazing example of transmedia story telling.

When you think of Lizzie Bennet, most see a tome of Pride and Prejudice or Jennifer Ehle slowly coaxing a smile out of Colin Firth in the last scene of the BBC adaptation. Since April last year, the two hundred year old character has undergone a radical makeover in the form of a hugely successful web series.

Hank Green, one half of the Nerdfighting duo with brother John Green, and head writer Bernie Su, have created The Lizzie Bennet Diaries, a web series that lovingly references the classic text while reflecting life today and social media trends. LBD, as it’s known, has also created a staggeringly engaged online community.

It’s a perfect example of highly successful transmedia at work – a series of web tools that integrates the elements of narrative to create unique content based on existing (and out of copyright) properties.

Remaining loyal to the structure of Jane Austen’s work, Hank and Bernie have followed the same narrative arc, but have adapted characters and motivations so they make sense today and fit the medium. For instance, there are only three Bennet sisters in LBD – Lizzie (our fearless vlogging protagonist), Jane (timid but lovely) and Lydia (irrepressible and endearing). Mary makes an appearance as a cousin with Kitty as the family pet. Every change to the original is done with love and humour, it never mocks its source material.

Marriage proposals are now job offers, estates become large corporations and as for the shocking Wickham/Bennet development….well, our lips are sealed.

Green and Su have also integrated different social media platforms to develop characters and events from outside Lizzie’s perspective. Each character has a Twitter account composed by the series’ writing team where they interact with the public and each other. Jane works in fashion so her outfits and inspiration are posted on her Tumblr and Lookbook accounts.
Jane Bennet on Lookbook

Lydia starts her own web series to have a share of the spotlight but what starts out as an exercise in narcissism becomes something else entirely. Lydia Bennet has never been as beloved as she has in this form of Pride and Prejudice. The appearance of the characters (and cast) at last year’s VidCon brought real and imagined worlds together in a way that tickled the funny bone and imagination of the LBD audience.

The Lizzie Bennet Diaries appeals to new and established audiences. Many of the teens and adults who have gravitated to the series have no pre-existing knowledge of the story so every new episode is a revelation. The dialogue, acting and variations in the story give viewers familiar with the novel a new experience which often challenges them to think about characters in a different way.

The series also encourages audience participation. Viewers are actively involved in the characters’ lives – giving Lydia advice (or warnings…) in YouTube comments, chatting with characters on Twitter and pestering creators to hurry up and introduce Darcy!

One of the most interesting spin-offs from LBD is the fan group, The LBD Seahorses. Before Lydia’s fall from grace, fans couldn’t agree which tragedy would ruin her in a contemporary setting. Pregnancy seemed to be the frontrunner. The question was then asked, “What would Darcy even do to help the situation?” To which someone replied, “He’d offer to carry the baby for her.” “Oh, so he’s going to become a seahorse?”

And so the niche group was born.

LBD Seahorses group on Twitter

While it doesn’t make a whole lot of sense, and not all LBD fans love it, the group is a great example of how web based media evolves. In a recent Lizzie Bennet Q&A session there was even a shout out for this fan group.

The creators couldn’t have anticipated the audience driven art, discussions and interests inspired by the series. The actress who plays Jane often styles her hair using ideas from the World War II era prompting questions about how she does it.  Jane posted on Pinterest and made video tutorials so now fans are wearing elaborate hair styles like Victory rolls and milk maid braids.

The Lizzie Bennet Diaries project is slowly coming to an end. This week celebrates the 91st episode and (almost) a year of continuous, free narrative-based content. Who would have imagined that a series of 3-5 minute videos and social media channels based on a classic reimagined text would so firmly capture young people’s attention?

Hank Green and Bernie Su did.

The big question is which classic will they tackle next?


Interactive writing and note taking with Meeting Words

Recently I attended an online seminar with Howard Rheingold, an advocate of using technology mindfully. As the session began, Howard directed participants towards a shared note taking space set up using the Meeting Words site. As the session progressed participants added notes in the shared space. They pasted in links mentioned by Howard, made their own notes and shared ideas. It was an interesting addition to the session and means that there is now a lasting record of the seminar.

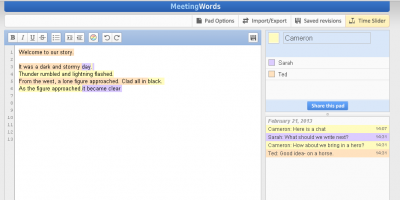
Meeting Words works in a similar fashion to the shared document editor in Google Drive. Most of the screen is taken up with a simple shared note taking space and a chat window appears on the right. Every participant’s entries  are colour coded, giving a visual representation of each contributor. Text can be overwritten or replaced by other participants and any changes appear in real time on screen.

Each participant’s contribution is colour coded.

As the name suggests, Meeting Words is perfect for taking notes collaboratively instead of relying on one person to  catch every piece of information. It would also be a great way to work on shared projects, such as group assignments or curriculum planning. But the site could also have more creative applications.

Meeting Words would be a great way to do interactive, shared or modelled writing with a group of students. Teachers could even assist by adding in comments, helping make revisions or using the chat window to suggest ways the story might progress. There is even a time slider function to see how the piece has progressed from start to finish.

Meeting Words is easy to set up, users can start contributing to the document without needing to login, and the colour coded text means that you can easily see what has been contributed. While the tool has some similarities to Google Drive’s document editor, these clever features make it well worth exploring.


Make a digital mural with Mural.ly

Mural.ly is an interesting new site that lets users create a digital mural using images, videos, web pages and diagrams sourced from any website. While there have been other sites that have similar features to Mural.ly, it is definitely worth a look as it combines a number of great features from other web tools.

At first glance Mural.ly looks like a cross between Glogster and Wallwisher (which recently changed names to Padlet). You can pin items to a large virtual wall by either uploading the items, entering the url of the item or dragging the item into the Mural.ly window. You can also search Google Images from within Mural.ly, and connect your Google Drive account to add items from there as well. There are also inbuilt symbols, stickers, sticky notes and text boxes that can be added to your board. Several graphical organisers are also provided as templates. At this stage the graphic organisers tend to be more business focused, but hopefully some educational based templates will be added over time.

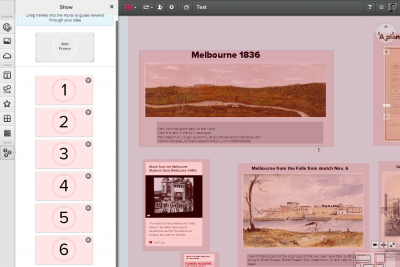
Where Mural.ly really sets itself apart from other virtual pinboard tools is the Frames options. This lets a user define the areas of the board that viewers will see in sequence. It works in a similar way to Prezi, one of the popular zooming presentation tools. Viewers can then click through and be taken on a tour of the elements of the board. Any interactive elements like videos or web pages can also be viewed from within the Mural.ly site.

By defining frames on your board you can tour viewers through your presentation.

Overall Mural.ly is an easy to use site with a wide range of educational applications. It could be used as a shared planning space, a presentation tool or as an inspiration board for a piece of writing (in a similar way to the Story Scrapbook tool). The ability to define frames also means that a board could serve as a way of telling a digital story, such as an animated timeline or a multimedia story.

Mural.ly is still in beta, meaning that you can expect a couple of minor bugs (particularly when zooming your board). It might not be ready for an entire class to use just yet, but I’d definitely recommend having a look at the introductory video below and exploring the site. You can also see a sample mural we built.

Mural.ly doesn’t do anything particularly groundbreaking, but it does take some of the best features of other web tools and puts them all into a very attractive package.

PLN registrations are now open

Registrations are now open for the next round of the Personal Learning Network, an online course run by the State Library of Victoria and SLAV. The course is the perfect introduction for teachers or school library staff looking to connect with other educators and discover some great free teaching & learning tools.
Computer Toddler
The PLN is delivered entirely online, meaning that participants can work through the course materials at any time. Over seven units you will explore tools to help you stay organised, discover useful resources, and explore issues like digital citizenship. You’ll also get started with blogging and learn about the range of free professional learning resources available online. Weekly webinars will also give you the chance to meet other participants and explore the themes of the course in more depth. The course is $115 ($105 for SLAV members) and commences on March 12. You can find more information or book online here.

The PLN is now in its fourth year, and this year marks a new and exciting time with the shortening of the PLN course and the introduction of several short courses. Alongside the PLN course there will also be an Advanced PLN running over four units in July, and the Research Toolkit will return in October 2013. We’ll keep you posted about these courses here on Bright Ideas, but if you’d like to register your interest in any of these courses then email pln@slv.vic.gov.au

For details of how to stay up to date with all of the news from the course and to connect with the #vicpln community make sure you have a look at our PLN page. We look forward to seeing you in the course and online.

Create ebooks with Readlists

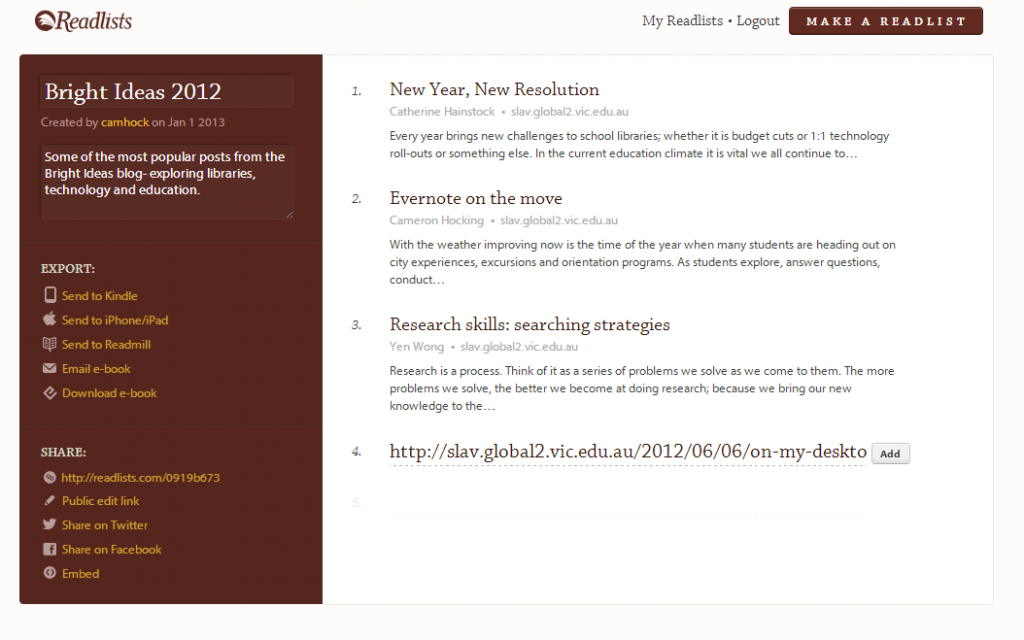
Readlists is a site that lets you put together bundles of articles, share these articles with others and also download the bundle as an ebook. It is a great way to curate reading lists for students or colleagues, save articles for later reading, or simply as a way of sending interesting articles to your ebook reader.

Readlist- Bright Ideas

Articles can be added by pasting the url. Lists can be worked on collaboratively.

Readlists can be created by anyone and no login is required (though you can login with a Readability account if you want to keep your lists together). Every Readlist has a url that you can share with others and you can also send out a different link that lets other people add to or edit your list. It would be a great way for colleagues to develop a shared reading list.

Creating a Readlist is a simple process. Give the list a name, write a brief description of the list and then begin adding articles by url. If you want to add an article that stretches over more than one page then it is best to look for a Print or View All on One Page option at the bottom of the article. This usually takes you to the full article with one url that you can add to your list.

Readlist- Bright Ideas

Once you paste the article’s url, Readlist will locate the title and author information.

Once you are done, click on the Export options on the left of the page to send your ebook via email, or to send to your Kindle or Apple device. Readlists can also be embedded into your website.

For a sample have a look at our Readlist of some of our posts from Bright Ideas embedded below. Click on the Export option to download the list as an ebook or send it to your ereader.

Save quotes instantly with Citable

Highlight text, click the extension and save the quote

The online document editor and storage service Google Drive is a great way to keep research organised, and a new extension has recently made it even more powerful. Citable lets you highlight web text and send it automatically to a Google Spreadsheet.

Once you’ve installed Citable you can select text on any webpage, hit the shortcut button and choose where you want to store the quote. Citable will automatically fill in the date & time accessed, author and address of the page. You can also add tags to help keep your quotes organised.

The extension works in the Chrome browser and doesn’t require a login. However, you do need to give Citable access to your Google Drive account, but like all apps you can revoke access at any time. You can download any files created by Citable from your documents and edit the document manually at any time. 

Visit the Chrome web store to install Citable. If you need help getting started then here is our step by step guide to installing and using the Citable extension.