Research skills: searching strategies

Research is a process. Think of it as a series of problems we solve as we come to them. The more problems we solve, the better we become at doing research; because we bring our new knowledge to the next problem we have to solve. So, where do we start?

1. Understanding your question

It’s important that you understand what you are trying to find – dictionaries, the internet, or books can help.

Take the following question as an example:

Women’s lives in the seventeenth century

The research topic is rather straight forward, but then we might wish to draw some boundaries such as’ where’? In England? In Australia? Or in a specific community?

2. Identifying the concepts in your research question

Women’s lives in the seventeenth century in England

We have three concepts here: 1) women, 2) lives, and 3) 17th century

3. Brainstorm synonyms for the key concepts

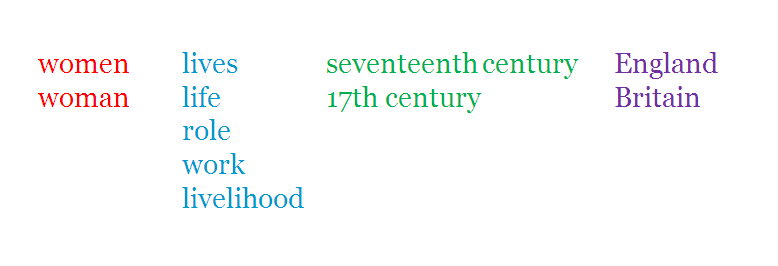
Using different combinations of synonyms for your search. Be aware of spelling variations (eg civilisation and civilization), and the differences of word usage in different parts of the world (eg. bathers and togs, or bush and forest). See below for an example of the different synonyms we could use for our search.

4. Search

Now comes the fun part: search by stringing the concepts together. You do not need to use ‘AND’ when searching the internet, library catalogue, or databases because the ‘and’ function would have been built into the system and set by default. Try searching in as many combinations as possible using the synonyms you’ve brainstormed. For example:

women lives “17th century” England
(note: I’ve used the ” “sign to ensure that 17th century stays together and in that particular order)
or
woman role “17th century” England
or
women livelihood “seventeenth century” Britain

5. New knowledge gained

You’ll find that you’ll gain new knowledge as you gather your information, and this could influence you to change your question to something a bit more specific – and that’s quite alright. Good luck!

Interactive fiction with Twine

Interactive fiction has been around in many forms for quite some time, back to the Choose Your Own Adventure books and early text based computer adventure games. Creating interactive fiction is a great way for students to consider story structure, pacing and the motivations of characters, and the free program Twine is an easy way for students to build these interactive stories.

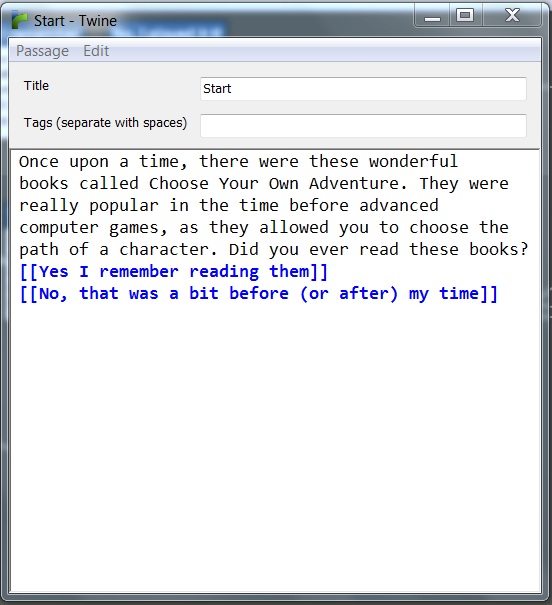
Twine is a free download for Mac and PC. Story elements are laid out in a visual editor, which shows the story structure and progression of different storylines. Each passage can include a number of different options for the reader to take, and Twine will keep track of any broken links so the reader won’t run into any dead ends.

Each passage can include a range of options for the reader to select

Writing even a relatively simple story ends up becoming quite a time consuming process when you consider the number of different options available to a reader. But this also means that you are more motivated to write, and I found the process of producing interactive fiction much more engaging than simply writing a linear story. Some students may need some explicit scaffolding about how to build an interactive story, and many might also benefit from first reading some interactive fiction before they begin to write. In particular you might explore with students the importance of giving the reader a feeling of control. Engaging examples of interactive fiction tend to give the reader a number of branching storylines and endings, rather than simply funneling every reader back to the same ending, no matter the choices they make.

Even a relatively simple story can look complicated, but the visual editor keeps it all organised

In many ways Twine is similar to Inklewriter, a site we covered recently on Bright Ideas. The visual nature of Twine’s editor makes it slightly easier to navigate than Inklewriter. Twine stories are completely text based, in contrast to Inklewriter which lets you include pictures in the story. The advantage of this is that students will need to consider how best to describe settings and characters, rather than using a picture. Twine also has more sophisticated editing options for searching and replacing phrases in your story, and gives you statistics about the story including a word count.

Inklewriter does have several advantages over Twine. It produces much more visually appealing stories and also has the added advantage of letting you publish your story online through the Inklewriter site. In contrast, Twine outputs all stories as html files. This means if you want to publish your story online you’ll have to host the file on your own site. Both services are free, so have a play with both and see which one suits your needs better. You might also like to have a look at a sample story I wrote in both Twine and Inklewriter to see the finished result (you’ll need to download the Twine story and open in your web browser).

Twine is an intuitive way to create interactive fiction and see a visual representation of the story. Hopefully tools like Twine and Inklewriter lead to more examples of this interesting genre.

Evernote on the move

With the weather improving now is the time of the year when many students are heading out on city experiences, excursions and orientation programs. As students explore, answer questions, conduct interviews or take photographs they will need to find a way to keep all of their work organised and the perfect tool for keeping all of this work together is Evernote.

We’ve written many times about the virtues of Evernote as a note taking, research and organisational tool. But Evernote also has a number of features that makes it ideal for use before, during and after excursions. Here’s how it could be used:

  • Students could conduct all of their planning before the trip and organise an itinerary or task list. Checklists can be created in Evernote, so students heading out on a self paced city experience or conducting fieldwork could have their day planned out in a checklist. They could also share their notes with the surpervising teachers so each teacher has the itinerary of each group
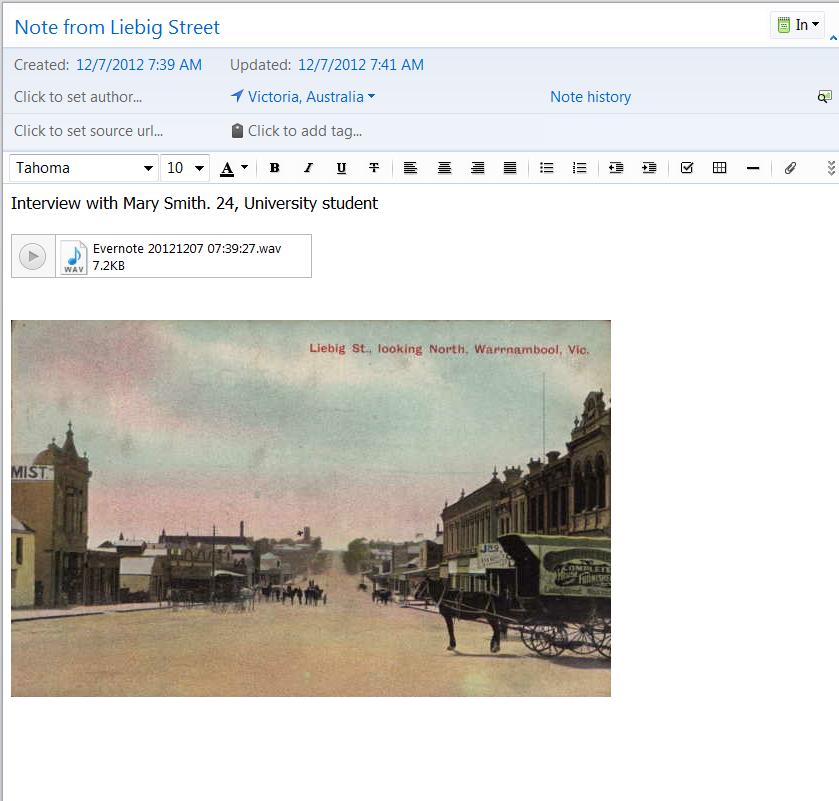
  • Notes can include text, hyperlinks, audio recordings and photographs so students can record their reflections or observations in a number of different ways. This means that students are considering the best way to capture their work during the day, and also presents them with more options when they return to school than a standard text report.

Notes can contain text, images and audio recordings


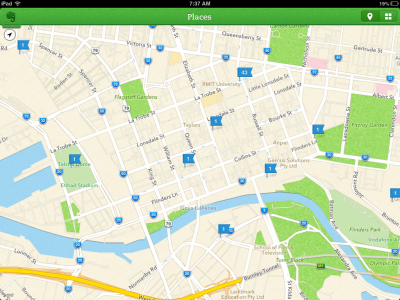
  • All notes can be automatically tagged with a geographic location, making it much easier for students to find the work they are looking for based on the location of a note. Students completing fieldwork or city experiences will have a comprehensive record of the day with notes sorted via location. You can also add location details onto notes manually. Use this handy tool to find the latitude and longitude of any location on Google maps.

Evernote’s Places view shows all geo tagged notes on a map

  • Because notes can be added into a shared online notebook teachers could be receiving automatic updates of the work of students. This would be particularly useful for those programs where students are out on their own for a number of hours. Seeing that real time update of student work while you are sitting in a coffee shop gives that added peace of mind that your students are active and, more importantly, safe. This is another benefit of the geo-tagging feature of Evernote notes.
  • Evernote integrates well with the annotation tool Skitch. This means that students could use Skitch to annotate photographs of places they visited, or annotate maps.
  • One of the great hassles of having students collate all of this information on excursions is getting all of the content off the device and on to a computer. But because Evernote synchronises online it means that everything will be waiting for your students back at school to get started. If your students are able to access free wifi in the location they are working then they can even synchronise their notes during the day. If they lose their device, at least the work has been backed up in the cloud.
  • After the excursion your students can use Evernote to complete their work about the day. Evernote also lets you share notes to the web, so it works well as an easy to use publishing tool for sharing reports or digital stories.

It is important to note that if you are a non premium user of Evernote (not a paid user) that notes can’t be viewed on a mobile device without an internet connection. Consider this if you want students to be able to access their notes created before the event.  However, notes can be created in the mobile app even if you are offline, then synchronised back when a connection is available. Increasingly you will find that many places your students visit will have free wifi available.

Let us know if you’ve used Evernote with students on excursion, or how you’re planning to use it when your students next head out of school.


Storify: Changing the way we tell stories

While technology is often used for getting work done and staying organised, sometimes the most interesting tools are those that lead us to new ways of doing things. The digital storytelling tool Storify definitely falls into that category. 

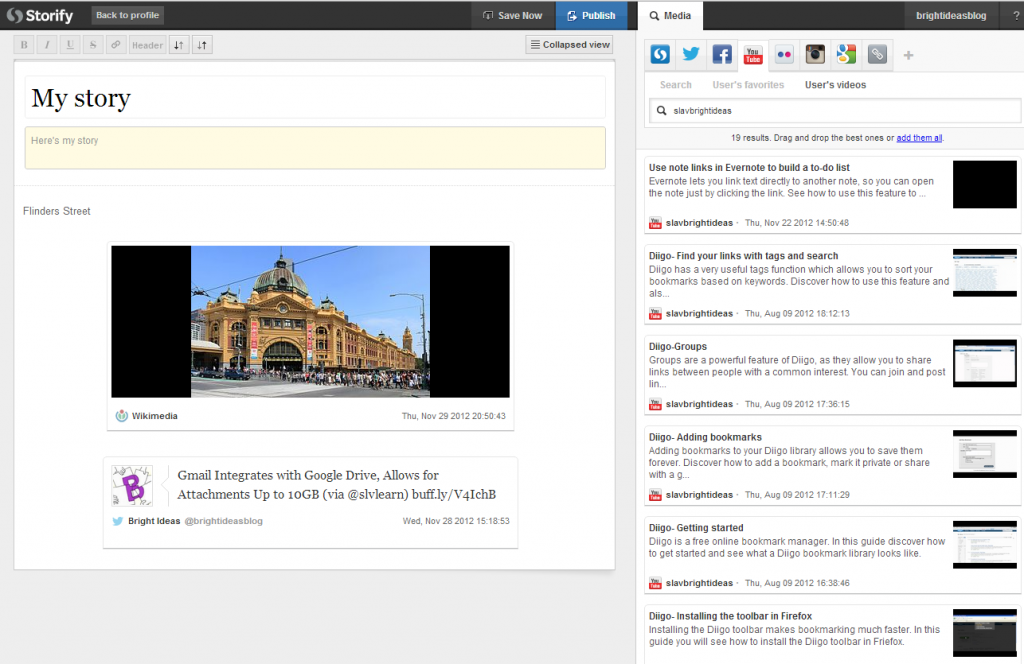
Storify allows for the creation of stories using a range of different elements. It can grab content such as pictures and video from many websites and also allows for text to be added. Perhaps the element that sets Storify apart is that tweets and public Facebook posts can also be added to a story. These elements are gathered together in a ‘storypad’ and can then be dragged into the story timeline (on the left of the screen). Have a look here for a quick demonstration of how it works. The great thing about Storify is that all content is linked backed to its original source.

Add  elements by searching in the storypad and then dragging into the story.

Storify has become a popular tool for recording reactions to news stories and current events because of the ability to add tweets to stories. It is also perfect for summing up professional learning events, like this example here of a recent SLAV conference. As YouTube videos can also be added it’s a nice way to put together a series of tutorial videos or screenshots. In fact, all of the tutorials featured on Bright Ideas are built in this way using Storify. You can follow our Storify account to stay up to date with new tutorials. Storify stories can also be easily embedded into your blog or website and there is an iPad app with a nice interface (though I’d recommend building long stories on your computer as I’ve found the app has crashed on me in the past).

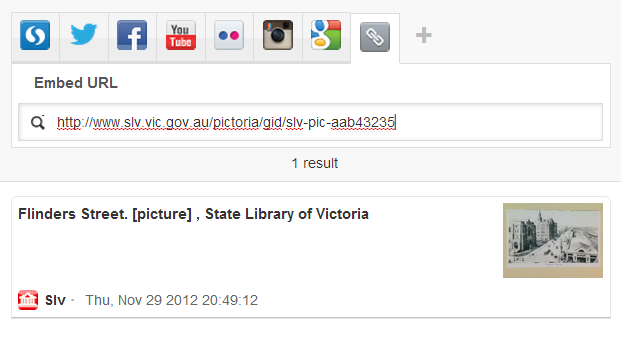
Elements can be imported from a range of sources. You can also search Google or use the link icon to manually add content.

Storify also has applications in the classroom. It could be used to create digital stories with pictures sourced from around the web. It would also be perfect for recounts of events such as excursions; particularly if students are also tweeting during the day or taking pictures and video. The linear nature of the story also lends itself to procedural writing, or it could be a nice way for students to present research projects.

Being able to bring in social media elements also means that Storify could be perfect for issues analysis. Students could link to annotated articles and news stories, but also include analysis of tweets by those involved or those observing. It would also be perfect for media analysis of shows which generate buzz on Twitter, like Q & A or Big Brother (that’s the first time those two shows have been mentioned in the same breath!).

Storify has been around for a little while now and a recent redesign means it is well worth exploring. The editor is great fun to use and the wide range of media that it can import lends itself to a number of exciting possibilities.

Cite in style with the EasyBib scanner

EasyBib is one of many freely available bibliography generators. While it has most of the standard options seen in other services, it does have some innovative features. You can link up your bibliography with a Google Drive document and automatically cite websites using an extension in Chrome. But perhaps the most interesting feature is the ability to add books using a barcode scanner in the EasyBib mobile app.

The EasyBib app is free and available for Android and IOS (Apple) devices. The app doesn’t require an EasyBib account. In fact one of the main limitations of the app is that it doesn’t integrate with your account at all. But the barcode scanning feature works well and bibliographies can then be sent by email.

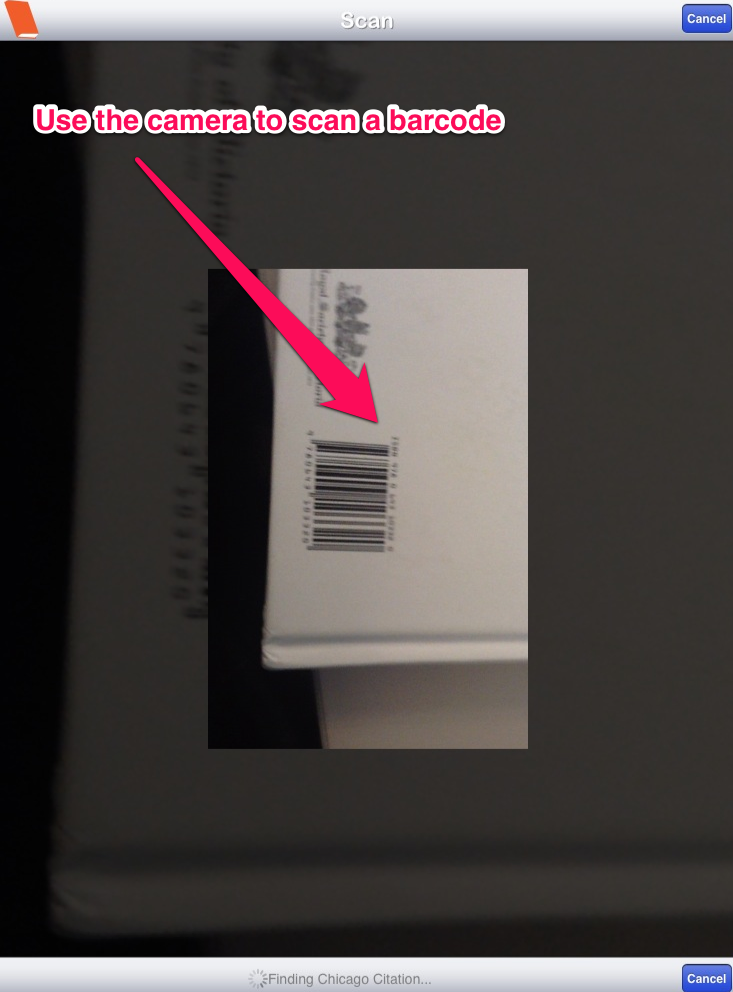
To use the scanner, simply open the app, click Scan and then point your camera at a book’s barcode.


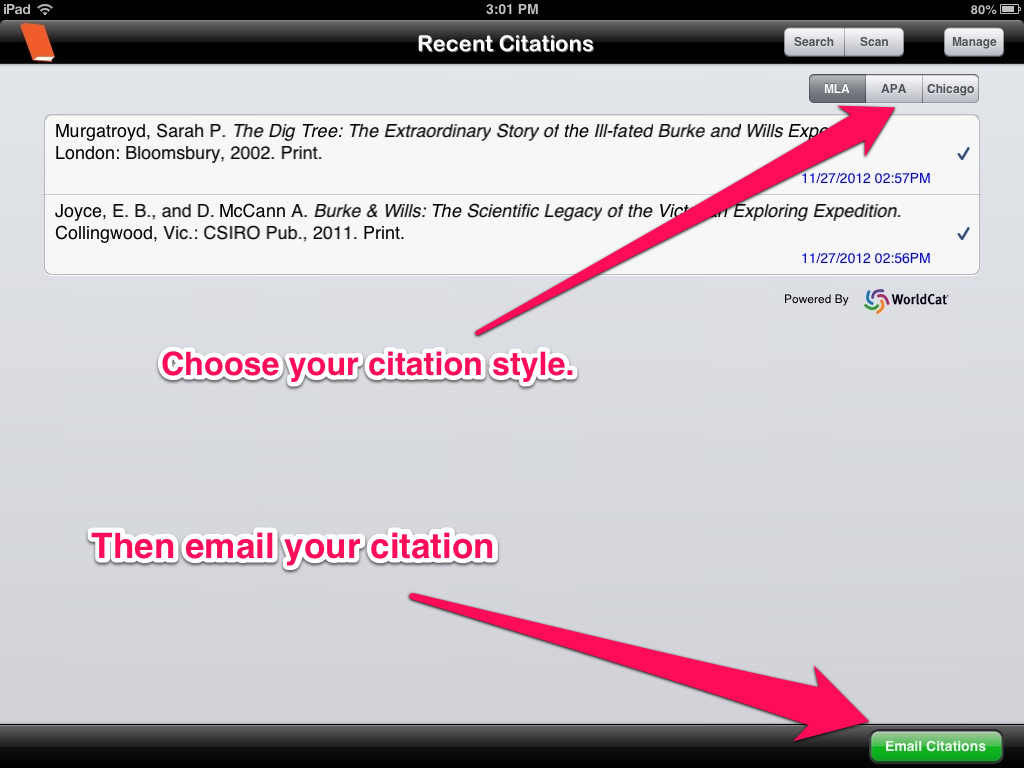
If the barcode is recognised the details of the book will be added to your citations list. You can select from MLA, APA or Chicago citation styles, organise your citation list with the Manage button, and then email your citations when you are finished. Unfortunately at this stage there is no option to manually edit or correct the details of an item.

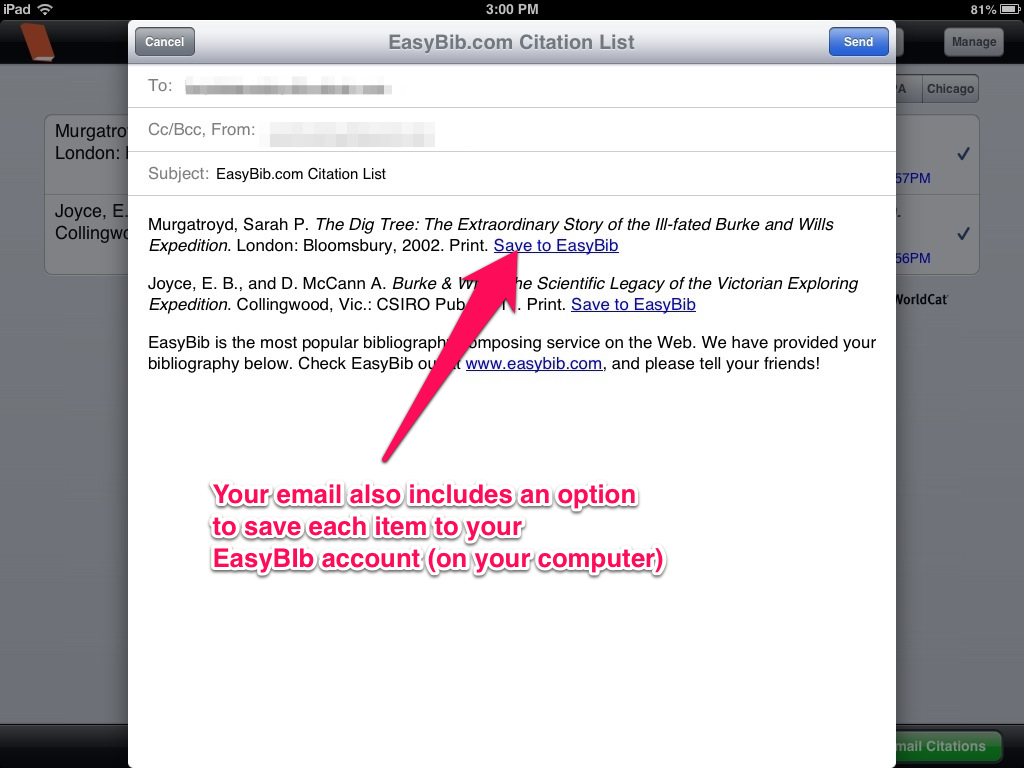
Emailed citations also include an option to add the item to your EasyBib account (once you are logged in on your computer).

Despite the limitations of EasyBib free accounts (such as limited citations styles) the option to scan barcodes in the app is definitely useful. It is certainly a feature that is likely to appeal to students, but might be even more popular with those of us who can remember those dark days of having to meticulously type out all of those bibliographies and citations.

Supercharging Evernote

Evernote is a useful tool for staying organised and keeping your notes synchronised across all of your devices. After exploring the uses of Evernote in the classroom last week, let’s look at two ways to make Evernote even more useful- note linking and bookmarklets.

Note linking is not a well publicised feature but it has some really useful applications. Using the desktop version of Evernote you can find a direct link to your note and then hyperlink to it. Then when you click on the hyperlink the related note will open up automatically. Students could use these links to build a to-do list for the week, with direct links to a new note for each task they have to complete.

Use note links to build an interactive to-do list

Have a look at our video showing you how to build a to-do list using note linking.

Adding bookmarklets to your iPad (or iPhone) browser is also a great time saving option. One of the problems with the iPad is that it is time consuming jumping between apps. If you are reading a page in Safari and want to save it to your Evernote account you need to install a special shortcut (called a bookmarklet) that will do it for you with a few clicks. Our tutorial video below takes you through the (rather complicated) process of installing an Evernote bookmarklet on the iPad.

You can also install other bookmarklets for useful services such as Pocket, Instapaper, Diigo and more. The process is similar to the one outline in the video, so visit this page or do a search online to find the codes you need to make the bookmarklets work.

Remember to subscribe to the Bright Ideas YouTube channel to stay up to date with all of our video tutorials.

Planboard: Time for a different plan

In this post Bev Novak takes a look at Planboard, an online planning tool that hopes to replace the iconic teachers’ chronicle. This post originally appeared on the NovaNews blog.

An email floated into my inbox not so long ago. It was the annual request by our school admin asking me to decide which kind of ‘teachers’ chronicle’ I would like to order for next year.

Ah… I think: Is it already time to start planning for next year?

My heart thumps furiously as I reflect on the many years of writing those course overviews, aims and objectives, semester plans, term blocks and weekly plans; not to mention of course the detailed day-to-day lesson plans. All that paperwork – the ‘essential’ adjunct to a teacher’s role.

But … hang on… it’s the twenty first century! Our world has shifted. Changed. We no longer do pen and paper do we? Nowadays it’s all on computer – no? Our lives are totally online – no? So, isn’t it time we changed the way we go about planning?

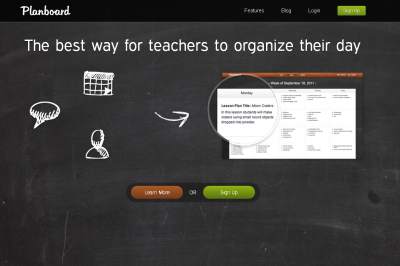
These were the thoughts that swirled around my head as I took a look at Planboard. It’s a neat, very easy to use program, allowing you to create your daily lesson plans in much the same way teachers always have. The big difference is that you do it online. Being able to work from anywhere, all that is needed is a computer, an internet connection, and a web browser. The lay out is straight forward and easy to navigate. Text can be formatted and links and videos added. There’s even a cute post-it-note to allow you to jot reminder notes to yourself. The completed plan can then be saved as a pdf and emailed on to anyone else. Nice!

With various options ranging from 100 lesson plans for free to a monthly cost, I can seriously see an online application such as Planboard taking over the traditional market. Check out the video here or have a read of this very comprehensive review.

While I’m sure this not the only ‘online chronicle’ it is certainly a reminder to us all that perhaps it is time for us to re-think the many routines that have for so long been associated with education.

Times have changed. Thinking has changed. We really do need to start doing things differently.

Thanks to Bev for sharing her post about Planboard. You can find Bev on Twitter and read her excellent NovaNews blog for updates on teaching and learning. 

All about Evernote

This week has seen the start of Research Toolkit, the first ever Victorian PLN short course. Over the next four weeks 150 educators will be exploring search skills, useful tools and digitised resources in this online course. The participants have been exploring Evernote in the opening unit so it seems fitting to have a look at some resources for making this service even more powerful.

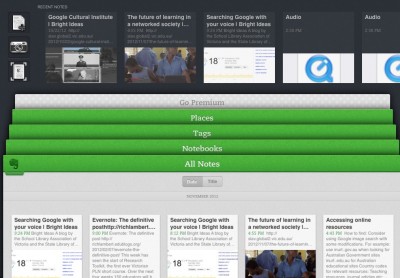
Evernote is a cloud based note taking tool that works on a wide range of  devices and keeps your notes synchronised everywhere. It allows for text, pictures, photographs and audio recordings. It can even clip entire web pages and save them for later. Notes you create can also be shared online, so it is an easy way to publish to the web as well.


Evernote also recently update their mobile apps

This convenience and power makes Evernote an excellent tool for education. Teachers can use Evernote for lesson planning, sharing notes with students, record keeping and staying organised. Students can keep their notes organised into notebooks, take photographs of the whiteboard (the handwriting will be scanned and is searchable) and access their work across a range of mobile devices. Many teachers are getting their students to create digital portfolios in Evernote. Because everything is stored in the cloud, it also means that a student’s work is transferable. They can take it into the next year level or even take it with them when they change schools. Imagine the possibilities of a student being able to access their writing from a previous year and compare how they have progressed. Or a Year 12 student being able to access their notes from a biology class they took in Year 10!

It is for these reasons that so many educators have become converts to this Evernote. I’m sure many of you are using it from day to day, but here are a few resources that you might explore to make the Evernote even more useful:

And for those of you looking for some simple ways to make your life with Evernote a little bit easier, why not check out our guide to using email to create notes in Evernote?


Learn for free with GCF Learn

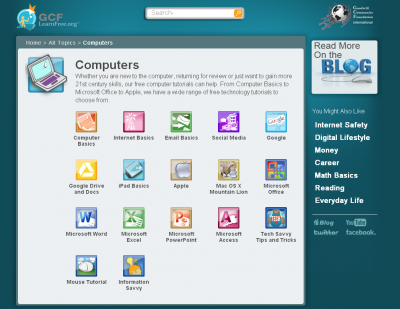
The Goodwill Community Foundation’s Learn Free website contains a number of useful tutorials for those looking to brush up on their technology skills. The computer section of the sites features step by step tutorials and guides to services such as Twitter, Facebook and Google apps.

The range of tutorials regarding Google services is particularly comprehensive. We often use Google’s suite of tools such as Google Drive (formerly Google Docs), Gmail and Chrome to stay organised as they all work with one Google account. The site features tutorials for all of these services and more. The Google Search Tips tutorial also provides a nice introduction to some of the more powerful features of the search engine and mentions the Google mobile search app that Bev Novak explored for us on Friday.

The GCF Learn site is well worth exploring, as they offer clear, easy to follow introductions to some very useful tools. There also have several mobile apps available for free download.

You can keep up to date with GCF Learn through their blog and YouTube channel.

The future of learning in a networked society

Technology company Ericsson recently released a thought provoking video about the future of learning in a networked society. The video features interviews with educational thinkers including Stephen Heppell, Sugata Mitra and Seth Godin.

The video is a compelling exploration of the connective value of technology. The interviewees touch on the issues of standardised testing, the impact of online learning and the use of technology to facilitate collaboration.

You can watch the 20 minute video below and find out more about the project at the Ericsson website.